Categories
Make up

Il Makiage Primer – No Filter Poreless Base Smoothing – my honest review

I’ve never been one for primers – it’s just something else to add on my face. If you’ve read any other of my blogs, you’ll know I try to limit the number as much as possible. I’ve always thought they were a bit of a gimmick, but after reading the reviews I decided to put this to the test and see whether or not it makes my makeup last even longer than normal.

I’ve been super impressed with both the Il Makiage foundation and concealer recently, so I thought I’d give this primer a go!

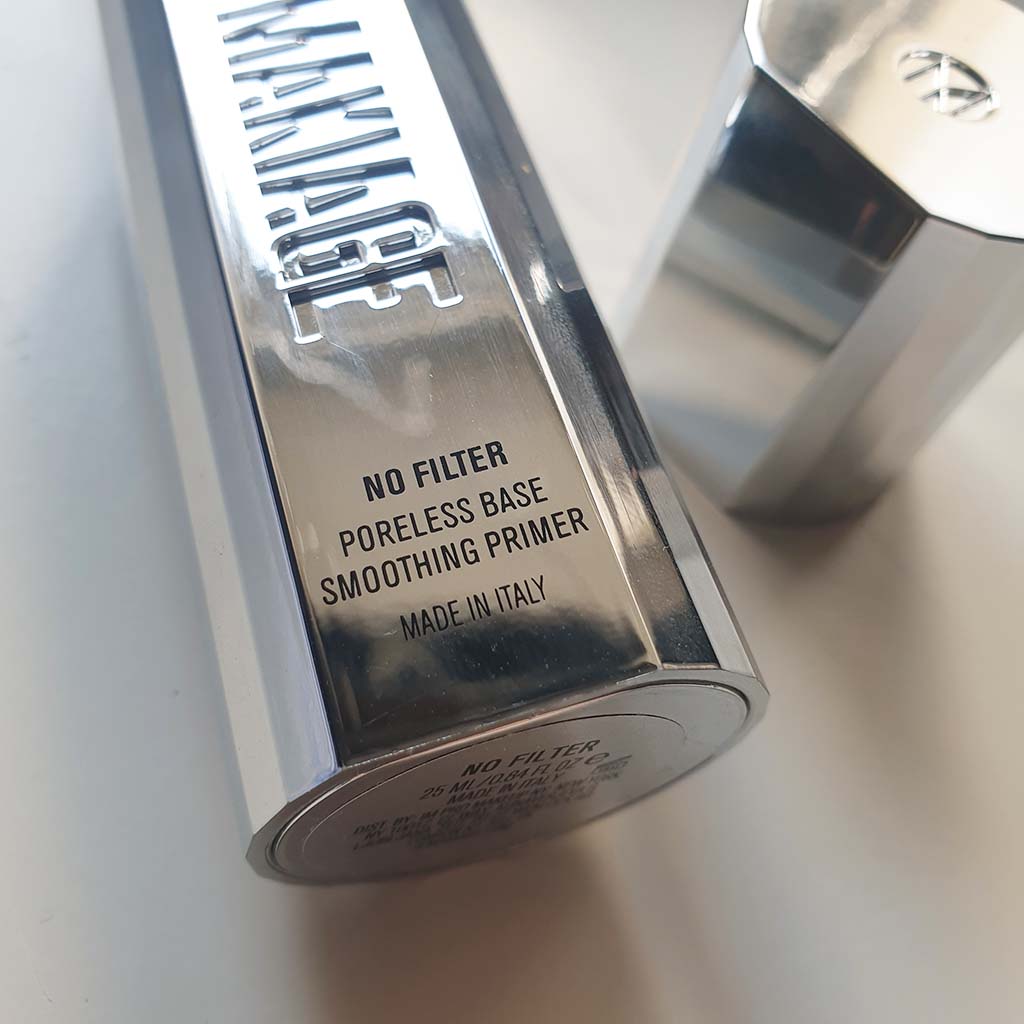
Our silky, weightless bestselling primer blurs pores, fine lines & wrinkles, instantly smooths skin & maximizes foundation wear time.

The lightweight texture & silky formula creates a soft, long-lasting photoshopped effect. You’re welcome, overflowing social calendar.

Description from Il Makiage

Why should you use primer?

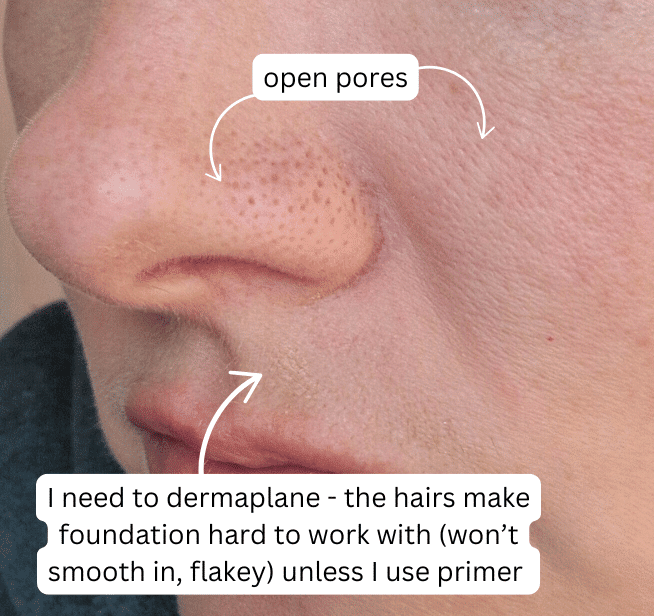
Primer is great for smoothing out your skin as a preparation step before putting on makeup. If you have fine lines, or blackheads (like me) primer will fill them. Foundation then looks so much better because it’s got a smooth surface to go on.

Primer also helps your makeup last longer.

I have oily skin and thought primer would worsen it because it’s like a gel. After using for a while, I’m happy to say it doesn’t make me want to tear off my makeup at the end of the day! It helps my foundation feel so light, it doesn’t feel like I’m wearing any.

When do you apply primer?

Ideally apply after your skincare and at least 10 minutes before applying makeup. This allows it to dry. If you don’t wait, your foundation is likely going to look cakey and ‘on top’ of your skin instead of smoothed in.

Does primer help older skin look better?

Yes absolutely. I’m even more invested in using a primer now than I was in my 20s and early 30s. It helps to smooth holes (blackheads) and fine lines so foundation looks better. What’s not to like?

Skin prep is so important when using foundation. If you have skin that’s not been exfoliated in a while, foundation won’t look good and it’ll probably go patchy. I’ve written some tips in my Il Makiage foundation blog, a little way down the page. It includes things like what I use to exfoliate, dermaplaning, cleansing & tretinoin.

What do I want from a primer?

I want a primer to:

  • keep my makeup on for longer
  • make my makeup look better
  • not bring me out in spots
  • not make my oily T zone worse
  • smooth out/fill in pores

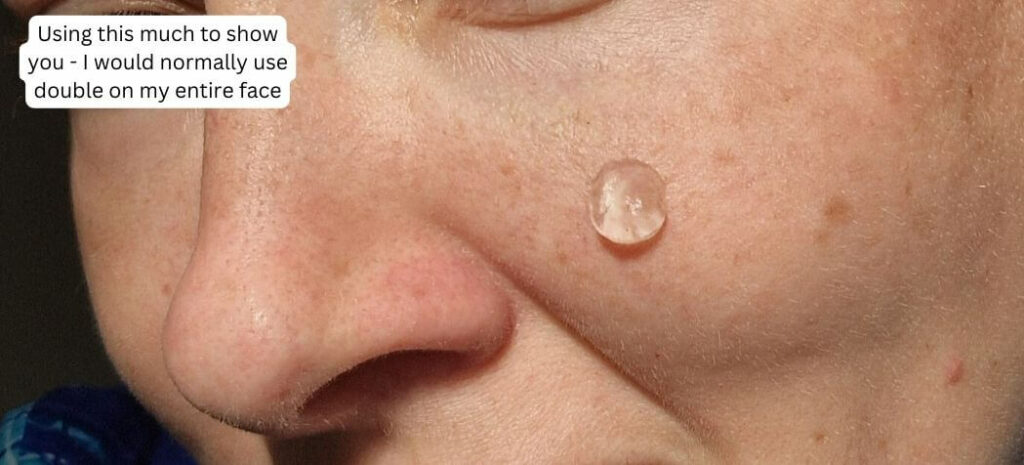
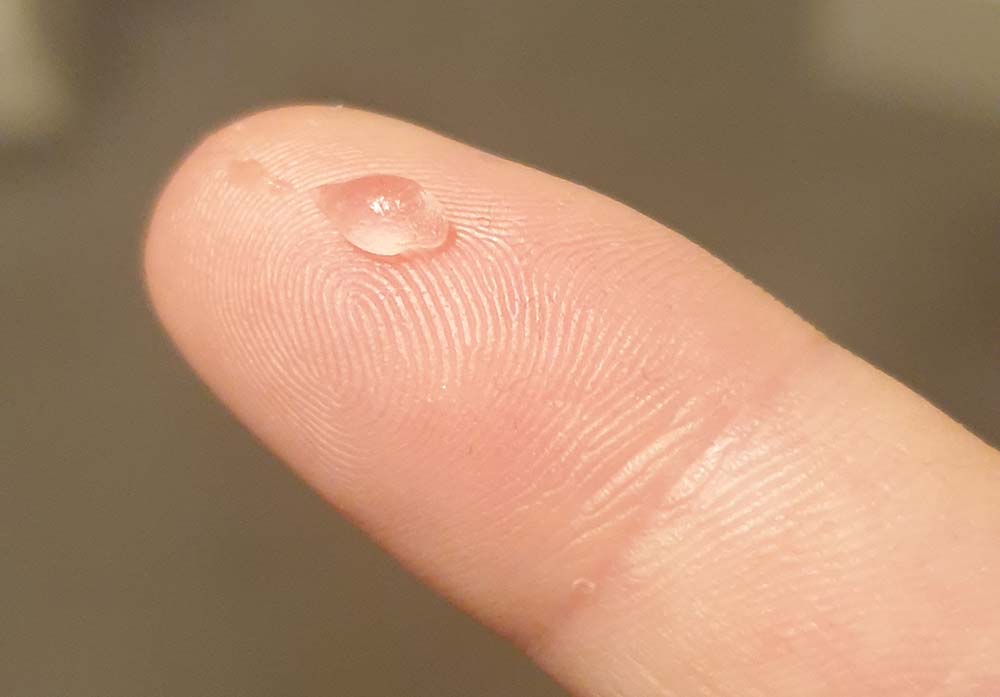
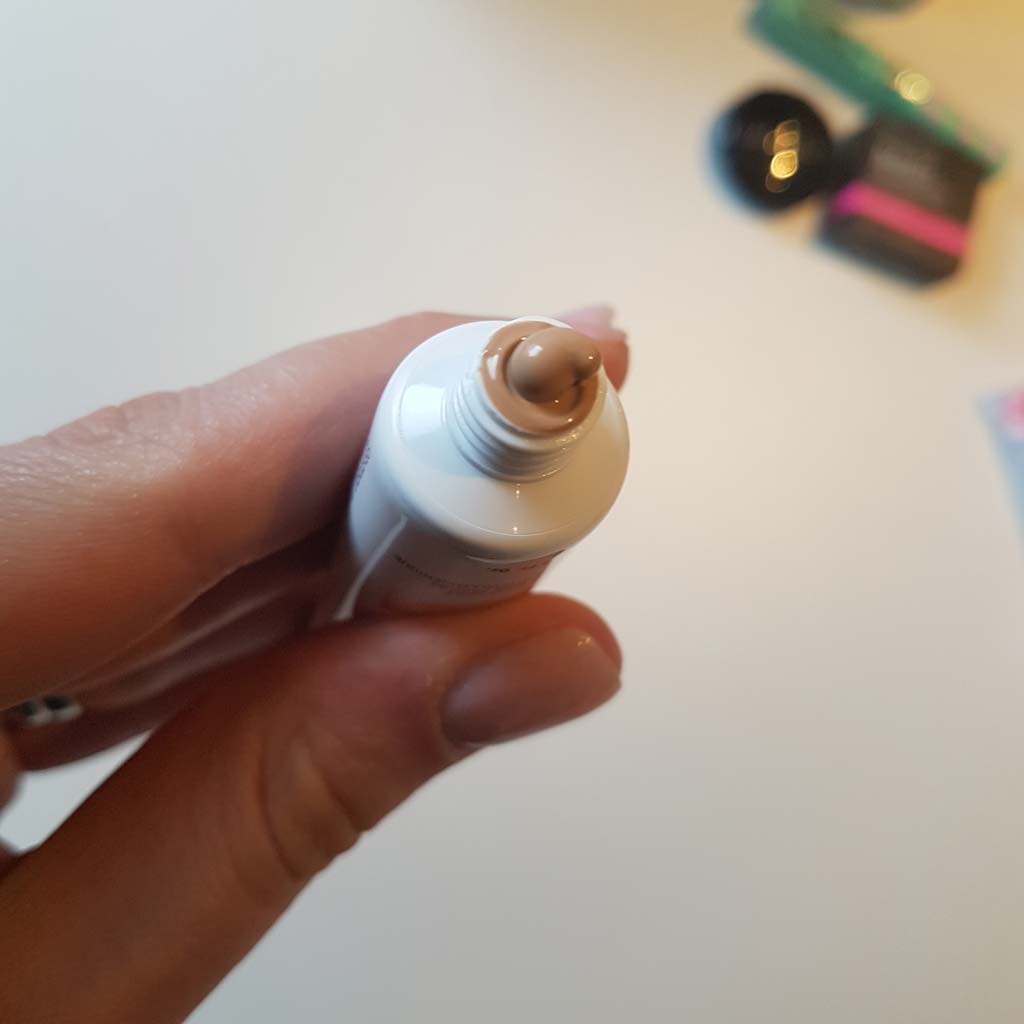
As with all primers, it goes on smooth and feels silky. I’m very particular about what I put on my skin, as it’s sensitive in places but mostly oily.

Il Makiage primer review - this is what nose holes look like when I haven't used primer
This is what nose holes look like when I haven’t used primer! This is one of the reasons I use a primer – to fill in fine lines, and these blackheads, so when I apply foundation, it goes on as smooth as possible.
Il Makiage primer - before and after photos
Il Makiage primer - my face after
It needs to dry here but you can see it’s filled in my pores, helping foundation stay on for longer and look smoother.

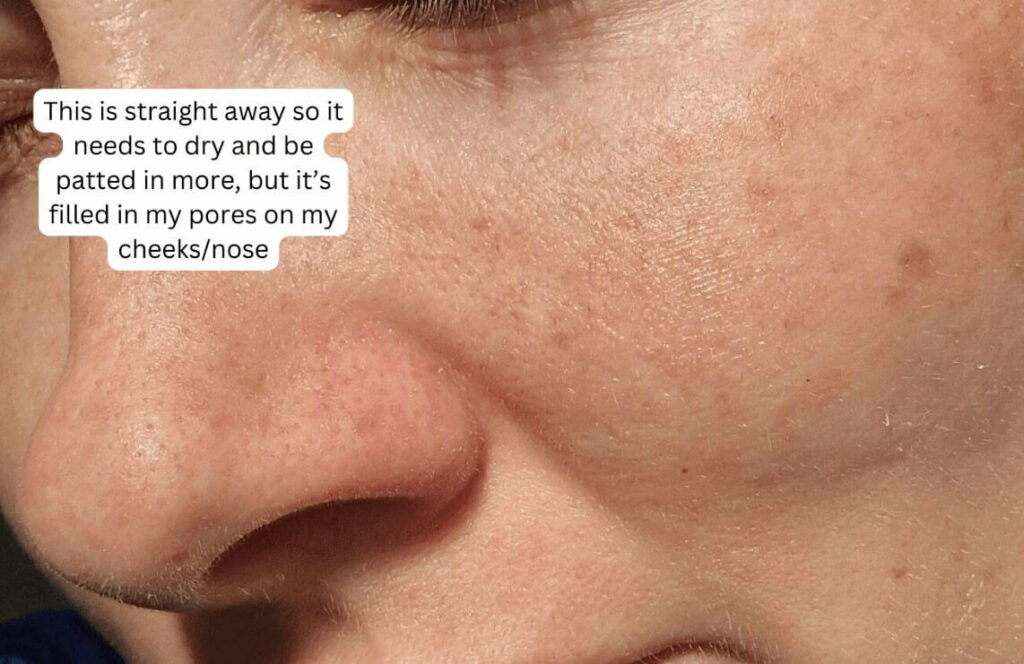
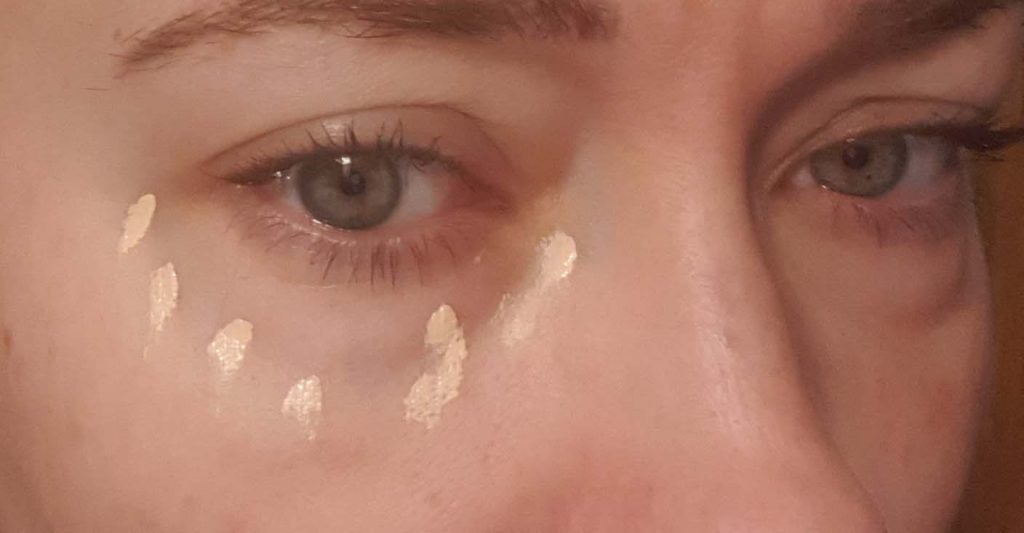
I didn’t have great light to show you BUT you can see the difference in my pores. The primer fills them and smoothes the skin. Once dry, you can then apply your foundation which looks better and stays on for longer.

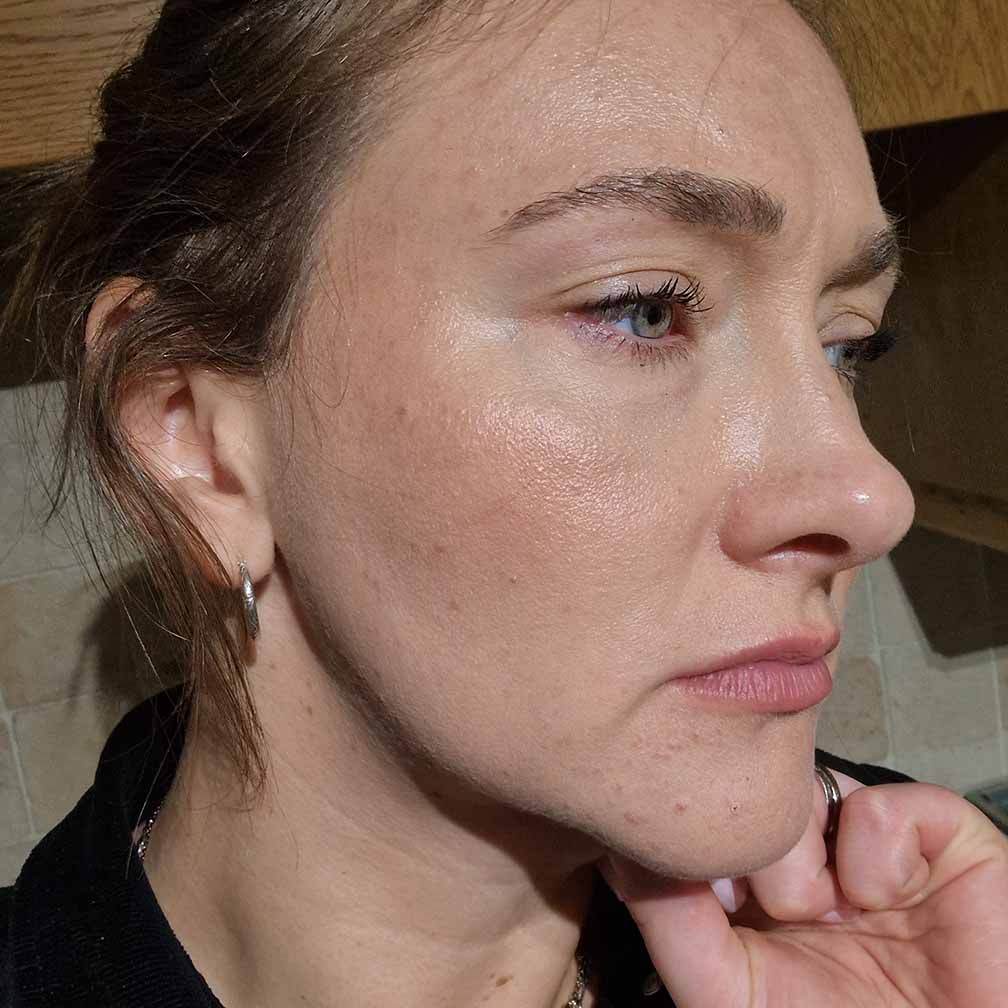
I don’t use a primer if I’m not wearing foundation. I tend to wear foundation if I’m going to work, which is a 10hr+ day including several hours in a car. When I get home, the foundation doesn’t have the same coverage as the morning (understandable), but it still gives good coverage.

How does it blend and look throughout the day?

I’ve tested it with concealer (Il Makiage F*k I’m Flawless). Working from home, I just want my bags hidden rather than wearing a full face of make-up. I smoothed in the primer to just one side of my face where I plan to put concealer – around/under my eye bag area.

It blends easily and is like a gel. It doesn’t pull skin and goes on like any moisturiser or cream.

Il makiage review - using woke up like this foundation
Putting on the foundation after skincare: starting with moisturiser, vitamin C, SPF then primer. Always wait at least 10 mins before putting on makeup. Sometimes I use a damp sponge to put foundation on and sometimes I use a brush! It depends what mood I’m in. I use Il Makiage’s brushes too, they’re lovely and soft.
Il makiage woke up like this review - using woke up like this foundation
This is me after a 17 hour day – including sweating and walking in the rain!

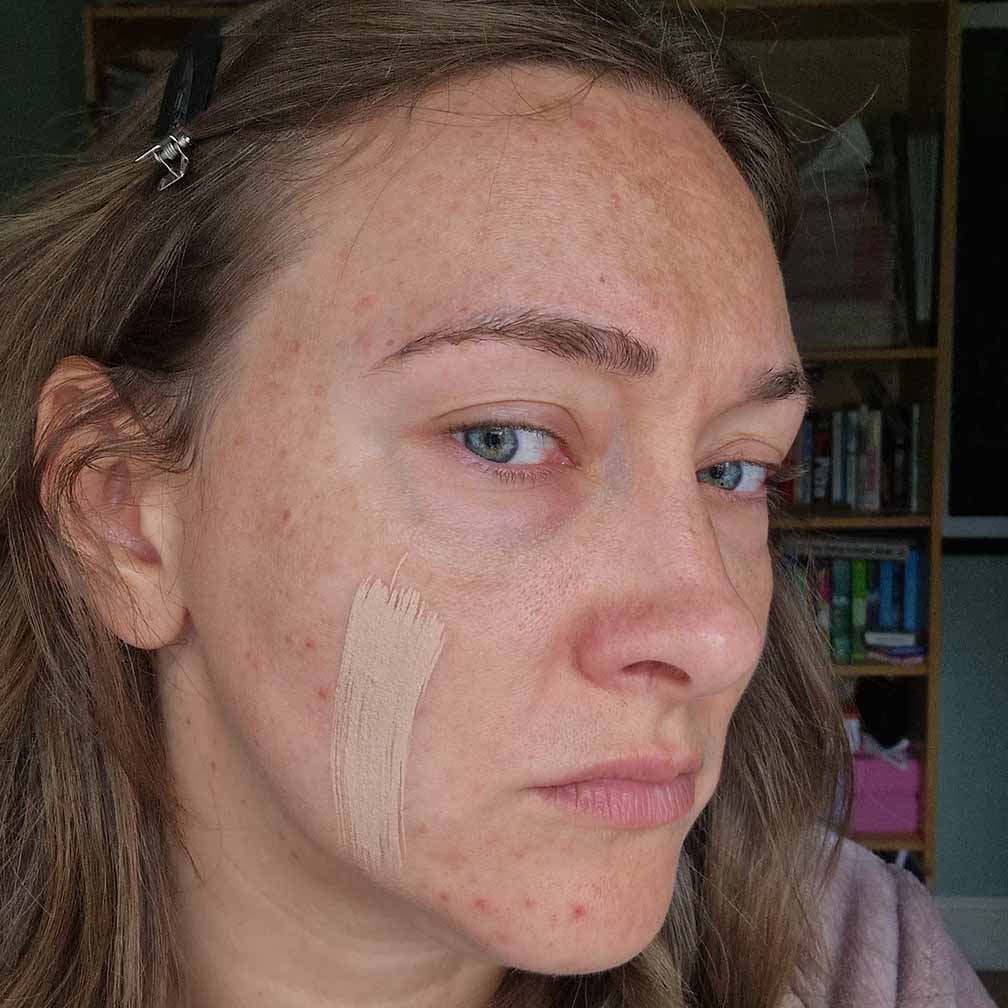
When I work from home, I don’t tend to wear foundation. I only wear concealer, and to make sure it stays on for as long as possible, I use primer to prep my skin! I only use a tiny amount as you can see, but it helps to keep my undereyes looking as fresh as possible for longer.

I put this much primer on one side – all around my eye area
Il Makiage primer - adding concealer after using primer
Putting concealer on after using the primer (& waiting for it to set)
Il Makiage primer - adding concealer after using primer - this is showing how my makeup looks at lunchtime
Lunchtime concealer with primer

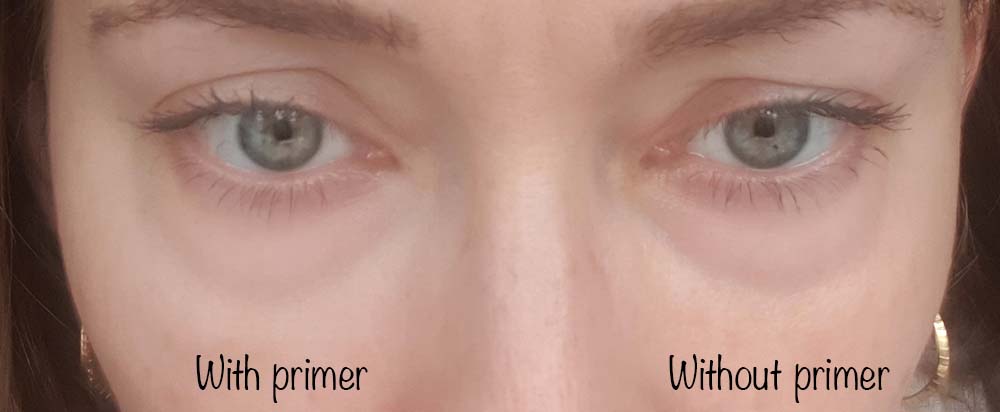
It’s not a huge difference, but you can see my undereye bag has slightly better coverage at the end of the day when using primer.

Il Makiage primer - adding concealer after using primer - this is showing how my makeup looks in the evening
In the evening – the eye that has primer has retained more concealer

How much is the primer and where can I buy it?

If you want to try it, buy it from Il Makiage for £36.

Use code ‘welcome10‘ for 10% off > ilmakiage.com

Primer is expensive, the same as foundations nowadays. My primer lasted over a year.

Other Il Makiage products worth mentioning

So far I’ve tried this primer, F*ck I’m Flawless concealer and Woke Up Like This foundation. I’m very impressed with all 3 products and would recommend them.

• • •

Thanks for reading :) This article is tagged with:

Categories
Skincare

9 tips on how to reduce acne and take care of your oily, hormonal skin

For the past few years I’ve started getting a lot of spots the week before my period is due – bigger spots around my face and smaller ones across my forehead. Not only that, I also get spots throughout the month – on the sides of my forehead, my cheeks and my chin. After a lot of reading and getting advice from friends, my skin looks more glowy and any spots I do get fade a LOT quicker than what they used to.

Here’s my list of my top 10 things to do, and not do, to help reduce the amount of spots you’re getting:

  1. Don’t pop them!
  2. Review what you’re putting on your face
  3. Use clean towels
  4. Use clean pillow cases
  5. Are you removing all your make up?
  6. Clean your make up brushes
  7. What make up are you using?
  8. What vitamins are you taking?
  9. Get a spot clearing gel

Don’t pop spots

You don’t have to tell me how hard this one is. There’s not much else better than popping a good spot and having the gunk ooze out. But this is doing your face no good at all. The white stuff in a spot is actually magical liquid helping to GET RID of the spot. So guess what? By squeezing the white goodness, you are 1. removing the goodness fighting the spot 2. making the bacteria go further into your skin increasing the size of the spot and increasing the time it takes to go 3. probably going to leave yourself a scar.

Tips for leaving your spots alone

Don’t look in a mirror.

When I get in and take my makeup off, my most popular time of day for a good spot-popping session was after my evening shower, after I’d taken my makeup off. Spots look worse after a shower because the hot water makes your pores open.

After a shower, I don’t even go near my (amazing) magnifying mirror. I put my creams/moisturiser on without looking. I don’t see my face all red and by the time I look in a mirror, my face has cooled and any spots have reduced in size.

Review what you’re putting on your face

Be honest – how many products are you putting on your face in a day? When I did this assessment, I realised I was:

  1. cleaning my face with a product (morning)
  2. putting 2-3 moisturisers on (morning)
  3. putting primer on (morning)
  4. putting make up on (morning)
  5. removing make up with a product (evening)
  6. putting 2 moisturisers on (evening)
  7. putting on night cream moisturiser (evening)

So that’s a minimum of 9 different products I was putting on my face per day. Your skin is only thin – it can’t possibly hold this much. I figured something must be irritating it so I started to slowly reduce:

1. how much of each product I was using (1 drop instead of 2)
2. reduce the total amount of products I was using.
3. not putting products on all over my face – taking care to reduce the products added to my oily bits (forehead) in a morning

Now my routine looks like this:

  1. cleansing my face with a product (morning)
  2. add 1x 2 moisturiser including SPF (morning) I’ve stopped moisturising my oily bits in a morning which has done wonders for stopping my forehead being so oily by the evening. SPF still goes on all over, though.
  3. add primer sparingly (morning) not all the time if I’m not wearing makeup
  4. add make up (morning) not all the time
  5. removing make up with a product (evening) I use The Body Shop Camomile makeup remover on my eyes, but for my face, I use a reusable Face Halo pad
  6. NEW: cleanse & tone (evening) – cleansing and toning take off every last trace of makeup/dirt from the day
  7. putting 2 moisturisers on (evening) any other products such as Retinol 3x weekly – I use the same products but I use 1 drop instead of 2 and I don’t use harsh products on my dry patches like I used to
  8. add night cream moisturiser (evening) unlike the morning, I put moisturisers on my oily patches which can be washed off in the morning and doesn’t make my oiliness worse during the day

My skin honestly feels like it’s breathing again and my spots have reduced from this routine.

Use clean towels

If when you wash your face, you dry it with the closest towel… stop! Your partner could have just used that to dry their feet. Or bum, urghhhh. The towel could have been sat wet for a time, collecting germs.

I never dry my face with a towel. I usually leave it to dry – it only takes 5 minutes. Or if I need to, I dap it with 2 small pieces if toilet paper. I never use something that’s already out, having been used already.

The same can be said if you use a reusable make up remover cloth. If you leave it out damp or wet, it’ll collect mould so it’s the last thing you want to use on your face.

Use clean pillow cases

I sleep for 7+ hours so that’s a lot of time my face is lay on something. If you have spots, the bacteria will rub off on to your pillow and stay there, so the next night, that bacteria will make its way back to your face.

I make sure to never sleep on the same side twice. I have spares so I don’t need to wash my pillow case and dry it before re-using.

Are you removing all your make up?

I’ve used Face Halo for a while now with The Body Shop Camomile butter make up remover to remove not only face makeup but also eye makeup.

My Face Halo’s have seen better days
The Body Shop Camomile butter – for removing make up

I therefore changed my routine a little. I still use the camomile butter on all my face including my eyes/face, but I also use a toner & cleanser afterwards to remove any last trace of makeup.

Clean your make up brushes

Easily forgotten! If you’re constantly hiding spots, you need to constantly be cleaning your brushes.

I use ISOClean to clean mine which takes literally minutes and they’re as clean as new.

Clean your make up brushes weekly or even daily

What make up are you using?

Do you have new spots appear during the day? If so, that could be a sign your make up is irritating your skin.

Your best bet is to try and see what works for you. Read online reviews and use https://www.skincarisma.com/ingredient-analyzer to check out the ingredients before you buy. It shows you any ingredients that could irritate your skin, in particular if you have spots, dry skin or oily skin.

What vitamins are you taking?

I’ve been taking biotin for hair growth. It works! But at the same time, too much, you guessed it, can bring on spots. I found this to be true. Since I’ve stopped taking a daily biotin vitamin, my spots have reduced. I now take only 2 per week.

Get a spot clearing gel

I’ve used Dermalogica Breakout Clearing Booster for putting on angry spots to help them disappear. I’ve also used Benzoyl Peroxide which kills the bacteria in spots, but it’s very strong and dries out skin, so use sparingly and be careful.

Update: March 2021

I’ve just started using polyester pillowcases which are soft enough to help improve your skin. They don’t soak in the lotions and potions you put on before sleeping, unlike cotton. I’m using them instead of silk, which isn’t cruelty-free. Have a read of my article where I discuss my new polyester pillowcases & show how my hair looks after sleeping. I was happily surprised!

• • •

Thanks for reading :) This article is tagged with:

Categories
Skincare

Birchbox ‘Cath Kidston’ Beauty Box April 2018

4/5 cruelty-free products this month from Birchbox!

This months box consisted of 5 products:

  1. ModelCo Baked Highlighter in Moonshine
  2. Beautaniq Beauty – Fill and Tame Brow Gel
  3. Cath Kidston Hand Cream
  4. Whish Shave Cream
  5. Marcelle BB Cream Golden Glow

Within the box, I got a 25% off leaflet to spend at Cath Kidston.

ModelCo Baked Highlighter

It’s obvious I like a product when I don’t put it back in the Birchbox ready to look at it another day. That product this month is the highlighter by ModelCo. I got to choose out of 2 shades which I’d prefer – and I got my chosen one, ‘Moonshine’. I don’t know if it’s a sample size or full size but at 1.5g/0.05 oz, you don’t get much. Not a problem – who uses that much highlighter anyways? (hello Kardashians) It’s super shiny and goes on like a dream. I used an eyeshadow brush to apply it on my cheekbones (with a few strokes). It stayed on all day too.

The highlighter is NOT cruelty-free, so I personally wouldn’t buy it again – however, ModelCo is slowly going the cruelty-free way, as they have a Vegan section on their website….. check it out here: https://www.modelcocosmetics.com/shop/vegan/

Cath Kidston Hand Cream

After much Googling, I do believe this hand cream is cruelty-free. Fab fab fab!

The smell is beautiful and fresh; it made my hands feel extremely moisturized. Took about a minute to dry which isn’t a bad thing seeing as though I’m typing this after applying. A little seems to go a looooong way and the one I got is 30ml.

Beautaniq Beauty fill and tame brow gel

“Nourishing tinted brow gel”
This looks promising but I use Wunderbrow so I don’t think I’ll use this #soz (unless I run out ofc)

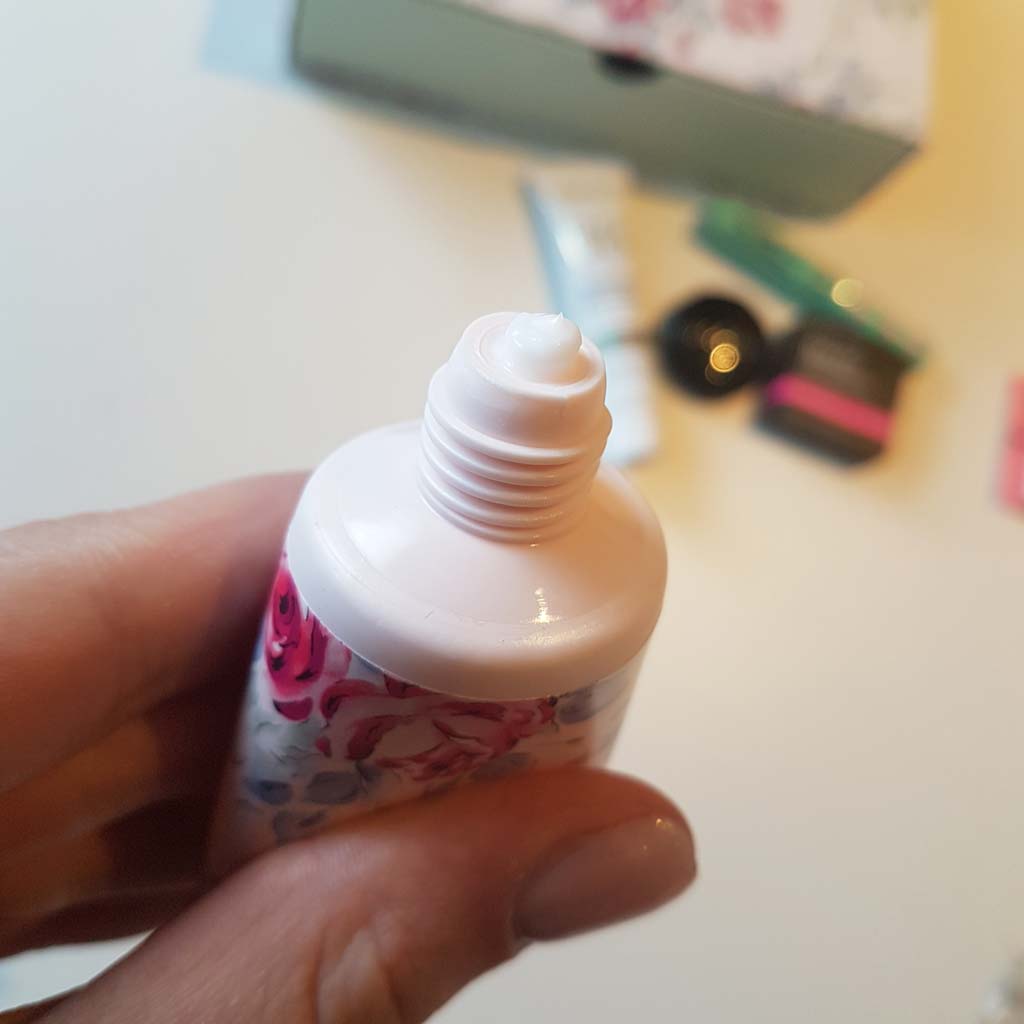
It has an icon on the tube which says cruelty-free – hurrah!

It looks like it’d be useful for those lazy days when I can’t be bothered to perfect my brows but want them styled, shaped and tinted.

Whish Shave Cream

Smells lush; smoothes on the skin like a dream and has a moisturizing effect; it’s slightly shimmery too. I got 22ml which, to be honest with my long legs and big thighs didn’t go far.

On the tube, it says, “tested on us, not animals” – another cruelty-free product! Amazing!

Marcelle BB Cream Golden Glow

This illuminator is too dark for my skin but has amazing reviews online from ladies saying it, “enhanced my skin” and “gave me a fab healthy glow”. It can be used as a primer, which is handy as well as a moisturizer.

Even though it’s too dark for me, I gave it a whirl by adding it to some other white moisturizer (it helped dilute the colour making it lighter) and I could definitely see a glow. I only put it on my cheeks (as I have an oily forehead) and it made them look plump and fresh.

Cruelty-free again as confirmed on their website https://www.marcelle.com/en/faq


Sign up and save £5 on your first box

Use my referral link (https://www.birchbox.co.uk/invite/ahoydesigns) to sign up, and get a fiver off your first box. You are welcome!

• • •

Thanks for reading :) This article is tagged with:

Categories
Skincare

Mabel + Meg Lumilixir Serum review

I first found Mabel + Meg Lumilixir Serum through a beauty blogger on Instagram. She put a few blobs on her makeup brush, along with her foundation, and began sweeping it across her face. It seemed to blend perfectly and gave her a dewy glow. I can’t remember who she was, but she was really happy and posted a fab review (not to mention, a bloody gorgeous selfie).

Now I’m not sure about you, but I always think…. “do you REALLY think that….. or are you being PAID to think that?” so I decided to buy some for myself.

Mabel Meg Lumilixir Serum review

When I looked into and read the reviews, it seems it’s not just a primer. It helps to (from their website):

  • Plumps and hydrates skin
  • Smooths complexion
  • Brightens skin
  • Paraben free
  • Oil free & non-comedogenic
  • Fragrance-free
  • Absolutely no animal testing (hurrah!)

It’s described as something you can use as part of your morning and evening routine, applied over a cleansed and toned face. You can moisturise beforehand, but you need to wait for it to absorb before applying.

It’s vegan and cruelty-free 😀

Mabel + Meg Lumilixir Serum – How do you use it?

It comes in a bottle with a dropper, so you can control how much you’re using (and it looks really professional). I use 3 drops on my fingers or makeup brush, then rub lightly all over my face. Once done and it’s still slightly wet, I apply my foundation. I use The Body Shop Fresh Nude foundation which glides on amazingly even. I then add concealer & blusher.

What are your results from using it then?

My skin looks fresher and dewy. I have an oily T zone, which has continued to be oily, so it hasn’t helped it (or made worse) It makes my face feel light, clean and brightened. My makeup also stays on all day, which didn’t before using this.

I get spots on my forehead and chin but since started using this, they’ve reduced massively. I still get them, but they’re tiny and not as noticeable. If I do get a breakout of bigger spots, I use this twice a day (once before makeup and once before bed) and the day after, they’re almost nothing.

Let’s get down to brass tax…

The bottles come in 20ml or 30ml, starting from £29 up to £39 for the 30ml. For me this is very expensive – my foundation and concealer comes to £50 so spending this on top makes me think “jeez, is it really worth it?”. So there’s only 1 way to find out…. coughing up £29 for the smaller bottle!

Mabel Meg Lumilixir Serum

I bought directly from their website, with £4 shipping fees. I’ve since bought it from Cult Beauty where I paid no shipping (over £40 though).

#TipAlert

If you buy from Cult Beauty make sure you first go through Top Cash Back – at the time of writing, “new online customers” can get 8% back. I’ve used it for years and I’ve had thousands back from it. It’s a cashback site – you visit Top Cash Back and find the brand you want to buy from. You click on it and find out what the cash back available is. You usually get a lower % if you’re already an existing customer of that brand. It takes ages to get paid out but you will eventually get it.

This is a screenshot of my Cult Beauty payout of £3.33 in my Top Cash Back account:

Cult Beauty payout from Top Cash Back

#TipAlert

If you choose to buy it from MabelandMeg.com, look out for the popups where you can get 10% off if you sign up for their newsletter.

Is it worth the money??

Honestly….. I’ll continue to buy Mabel + Meg Lumilixir Serum until I need the money elsewhere. £39 is pricey, so I’ll buy as and when – maybe a couple a year. 3 drops a day will last a good month… or 2. I don’t do as per the instructions and apply in the morning and evening – it wouldn’t last as long (unless I have spots, see above!) and I only want it to help glide on makeup. If I wanted it to stretch, I’d go down to 1-2 drops and only use a few times a week, or on nights out.

If you wanted to use it as a moisturiser then applying morning and evenings would be good for improving your complexion quick, even though you’d use it up faster. Even if it lasted a month, a month’s worth of high-quality moisturiser is well worth it.

UPDATE: 9th March 2019

I still use Mabel and Meg to this day. I usually buy in bulk as that’s when you can get the discount. I still use just 2 drops each morning after I’ve moisturised and before my makeup. It keeps my skin looking fresh, helps reduce spots and keeps my makeup on all day. I love it.

UPDATE: 17th February 2020

Yep… still using it. Had a few months off towards the end of 2019 whilst I was using other things (blogs to come; Beauty Pie, Aurelia probiotic to name a few) but I’m back to using this. It really is absolutely amazing at keeping my makeup on all day. I still get spots during my period week (NOTHING has helped with this, argh) but my oily forehead definitely is better after I use this. I still only use 2 small drops per day. I give it 10 mins to settle on my skin before I put make up on. Love this stuff. Don’t forget to find discount codes from my above tips if you decide to buy! Oh one last thing, the price is still the same – no increase!

I haven’t (unfortunately) been paid or received any goodies for this review. It’s from my own experience so you can believe it’s 100% honest.

• • •

Thanks for reading :) This article is tagged with:

My photo, hi I'm Rachael

Hi, I'm Rachael.

This is my beauty website where I review lots of different products, from make up, to CBD coffee and vegan moisturiser. I've been using products for over 20 years, so I hope I've gathered some tips and tricks to share, plus I'm always learning so I'll be sharing them too. I have oily-skin, that's acne prone, so join me as I navigate this new age being a millennial!