Welcome to Ahoy Beauty – focusing on articles where I discuss cruelty-free make up and beauty products for people who care about their skin.
Hi! I’m Rachael and the author on this site. I’ve been using ethical make up products for 20+ years (you do the maths!) so over this time, I’ve found some gorgeous products (and some not so much!) especially good for those who are ethically conscious and prefer make up that hasn’t been tested on our furry friends.
I’ve written about make up products to help those who are researching new things, to hopefully help your decision. My thorough reviews are hopefully helpful enough to help you decide if a product is right for you or not.
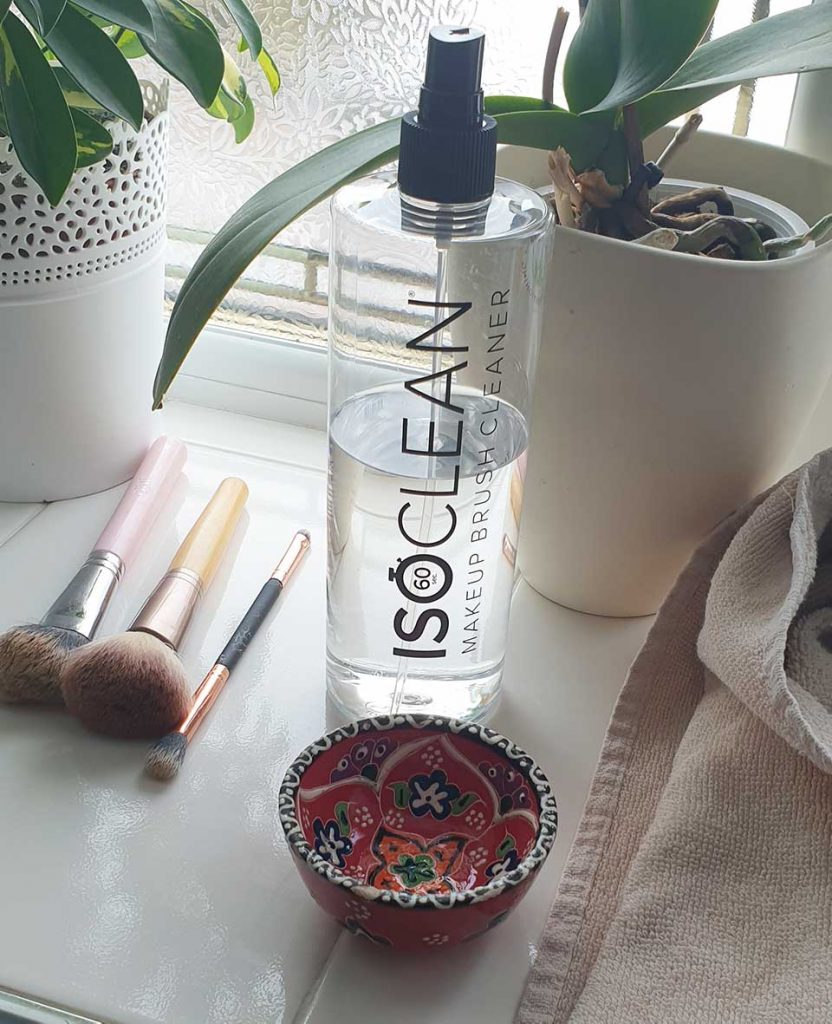
I’ve been using ISOCLEAN Makeup Brush Cleaner for years to quickly clean & sterilise my makeup brushes. If you don’t currently clean your brushes then you need to invest, especially if you suffer with acne. Bacteria will be living on your brushes transferring to your face with each use.
ISOCLEAN is vegan and cruelty-free.
Here’s how I use ISOCLEAN:
prep – get a towel & small bowl ready
soak the brushes with ISOCLEAN
gently rub on a towel to remove makeup
reshape brushes back to original shape
leave for a few minutes before using
It takes a few minutes to prep & clean the brushes. I normally clean them on a day when I don’t need to use them. Makeup artists (MUAs) use this cleaner in-between clients – that’s how sanitary it is, and how little time the brushes take to dry afterwards. I’d say they take around 30s-1min to dry, depending on the brush size before you can use it.
1. Prep – get a towel & small bowl ready
PREP YOURSELF: 3 brushes, ISOCLEAN, a towel & small bowl
With the 500ml bottle I bought, it didn’t come with a detachable drip tray. However, it does now, so I’d recommend getting it. It’s the same price with/without one.
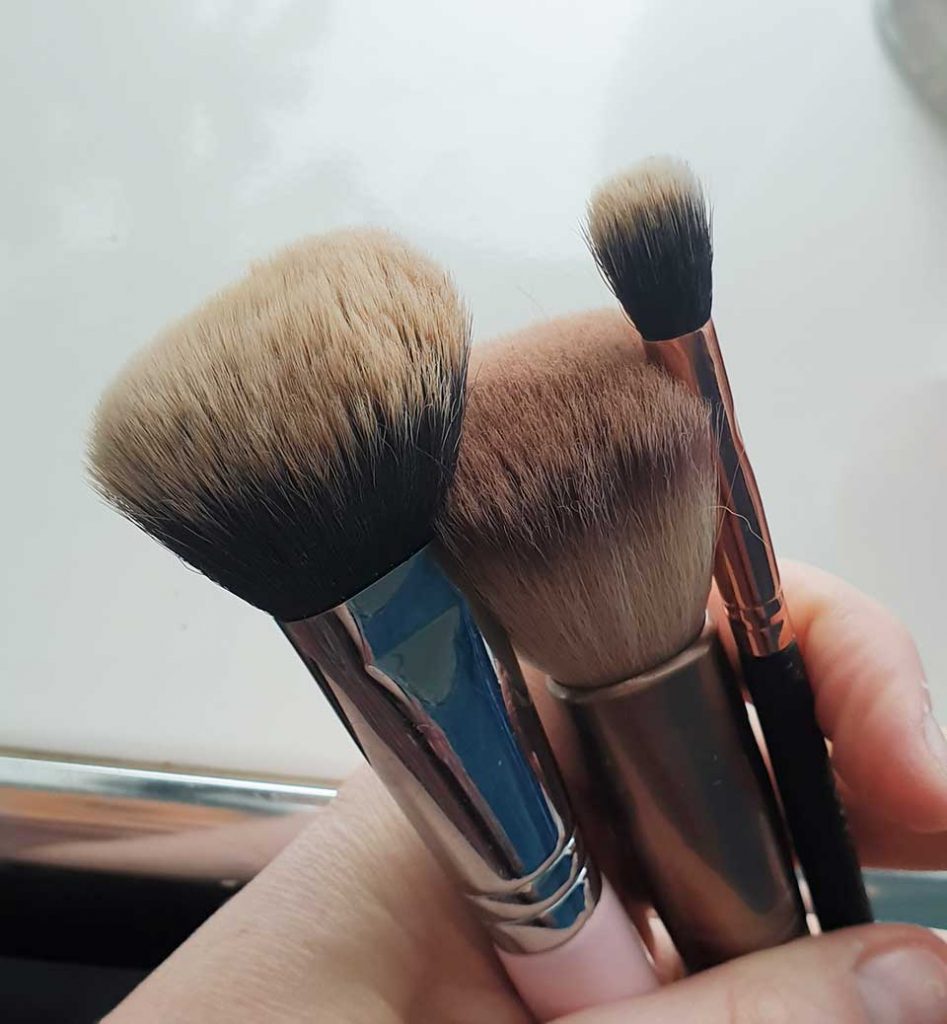
I only pour into the bowl as much as is needed to soak up into each brush. I use 3 brushes on a regular basis:
Mine comes with a spray top but I don’t use it. I feel by pouring the liquid out into a bowl and soaking my brushes in it, I get a better clean and waste less.
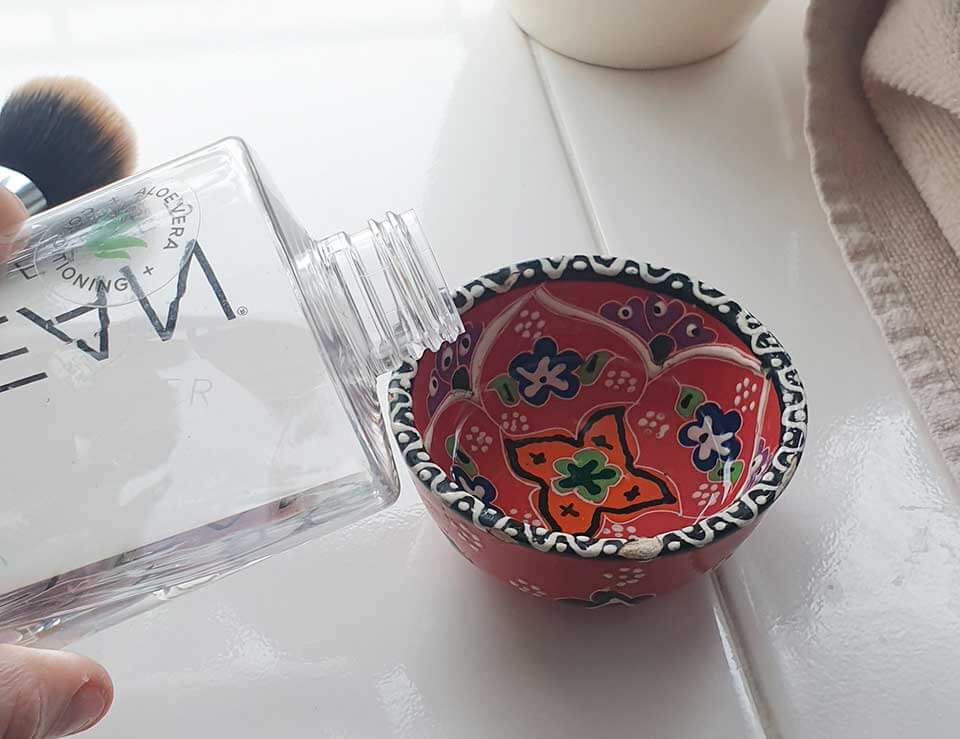
2. Pour ISOCLEAN into the bowl & soak
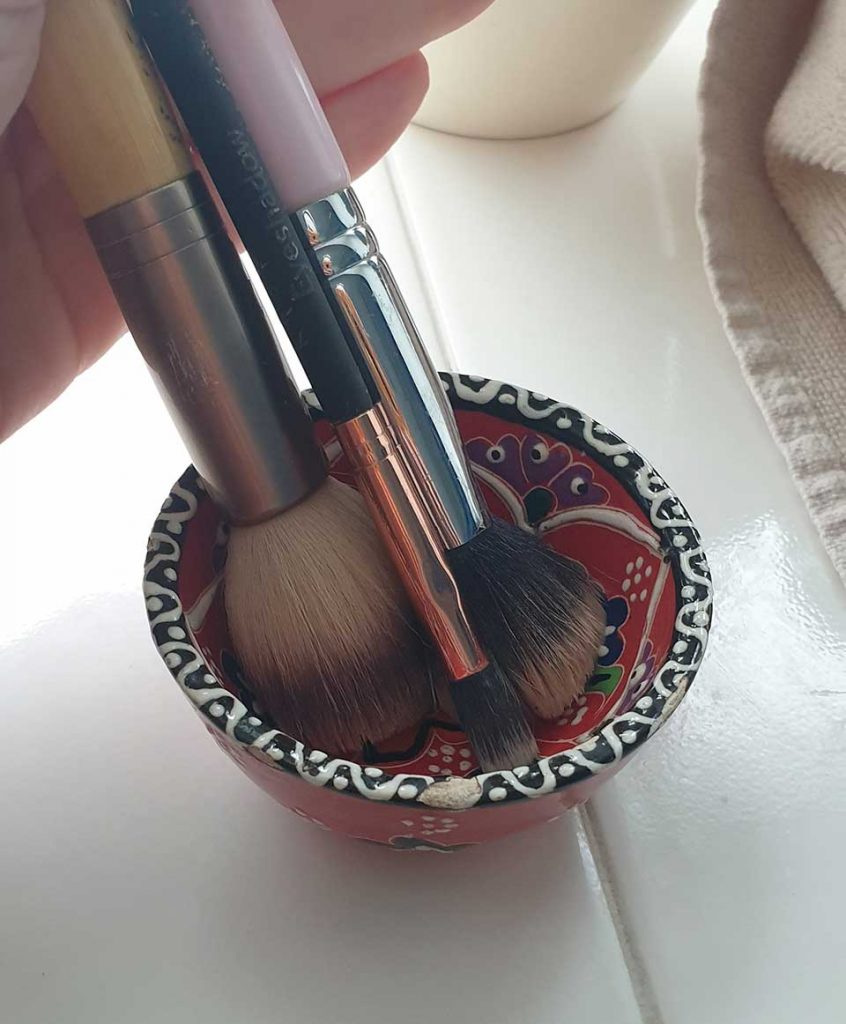
Once I’ve poured some out, I soak my brushes which should leave no ISOCLEAN in the bowl. Make sure to get everything wet; you need to clean the whole brush!
I pour the ISOCLEAN into this bowl – I pour just enough to soak up in my brushes
All soaked up
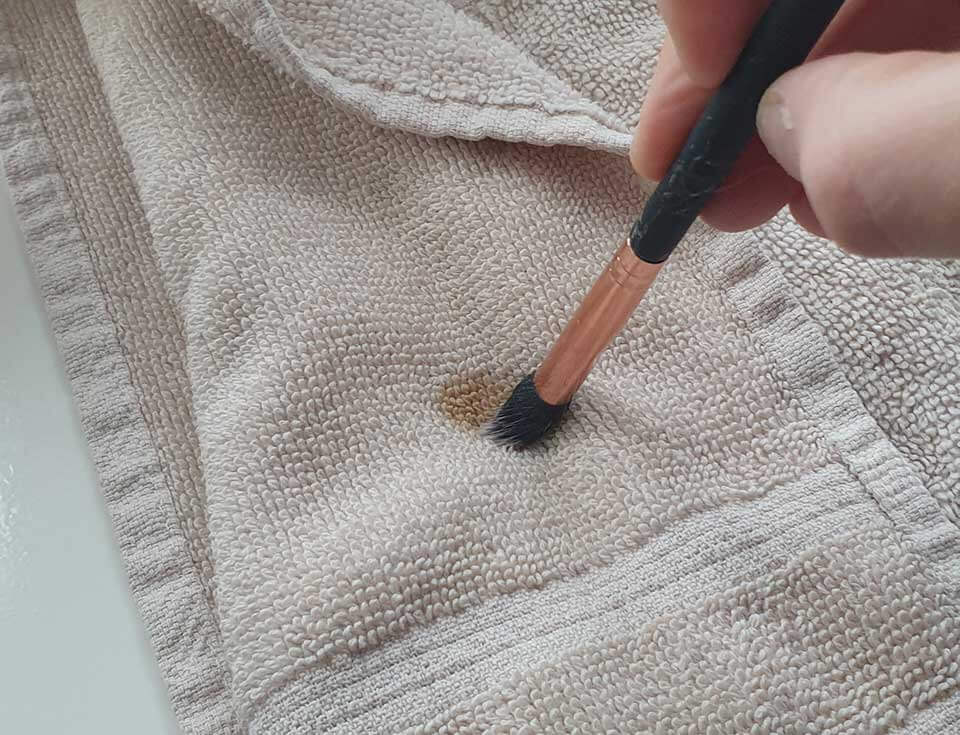
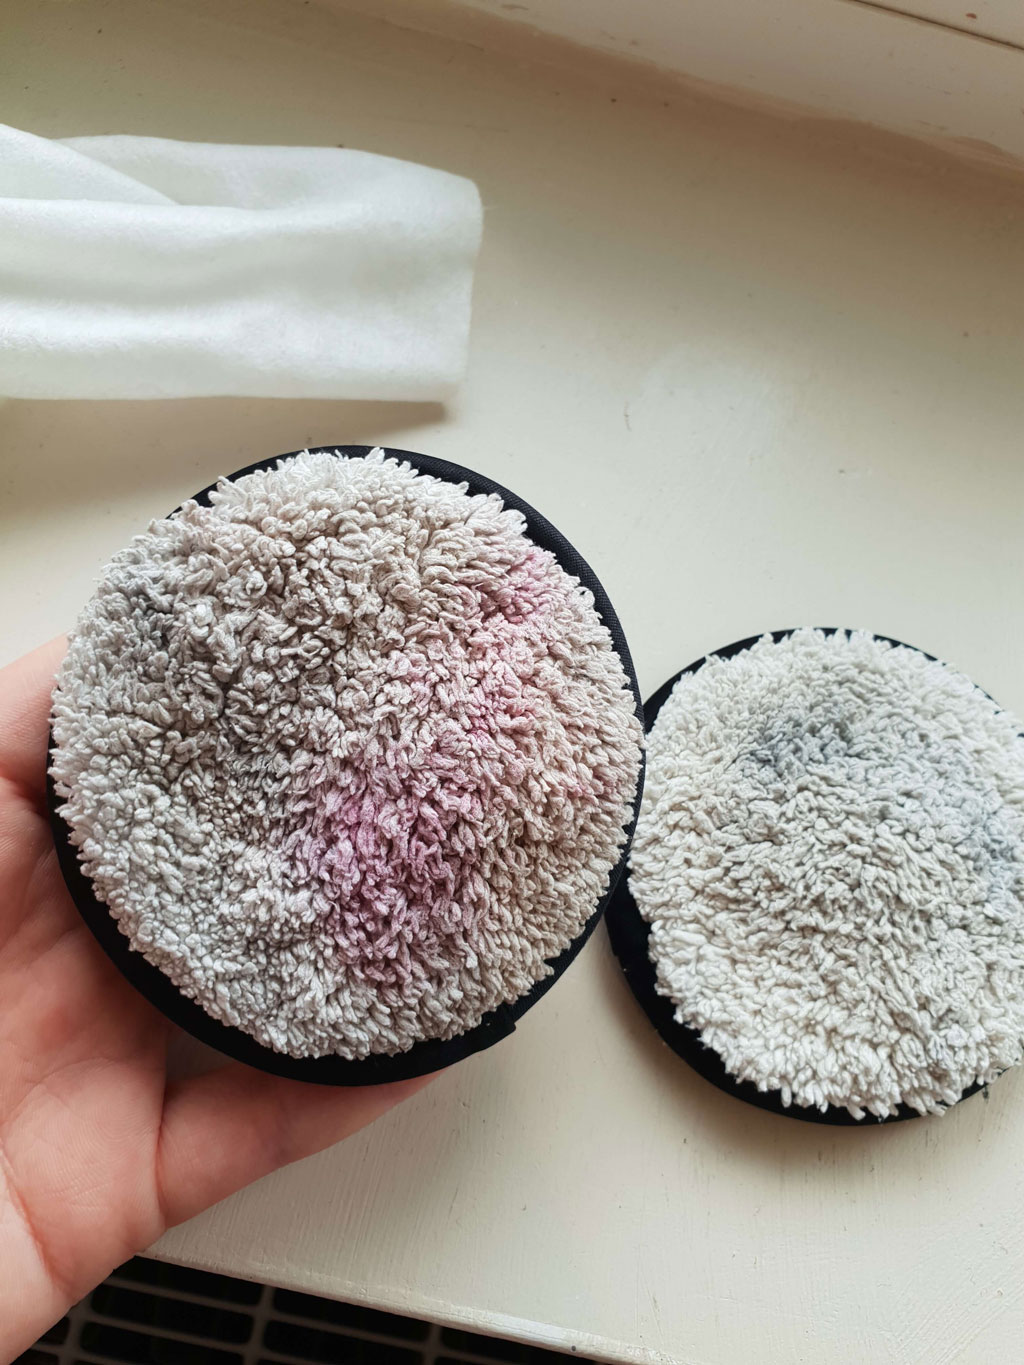
3. Use a towel to rub your brushes clean
I personally use a handtowel that’s quite rough. I wouldn’t recommend using a very smooth towel that doesn’t have texture; it’ll take longer to clean your brushes.
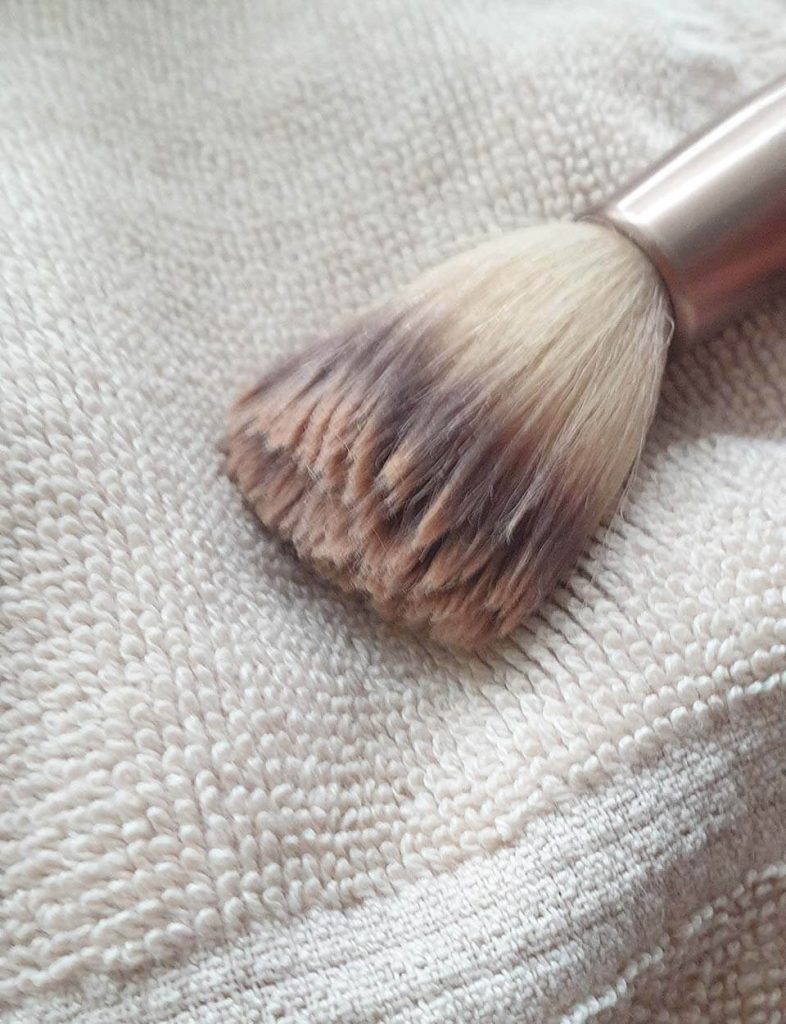
Blush brush soaked with ISOCLEAN – ready for a rub!
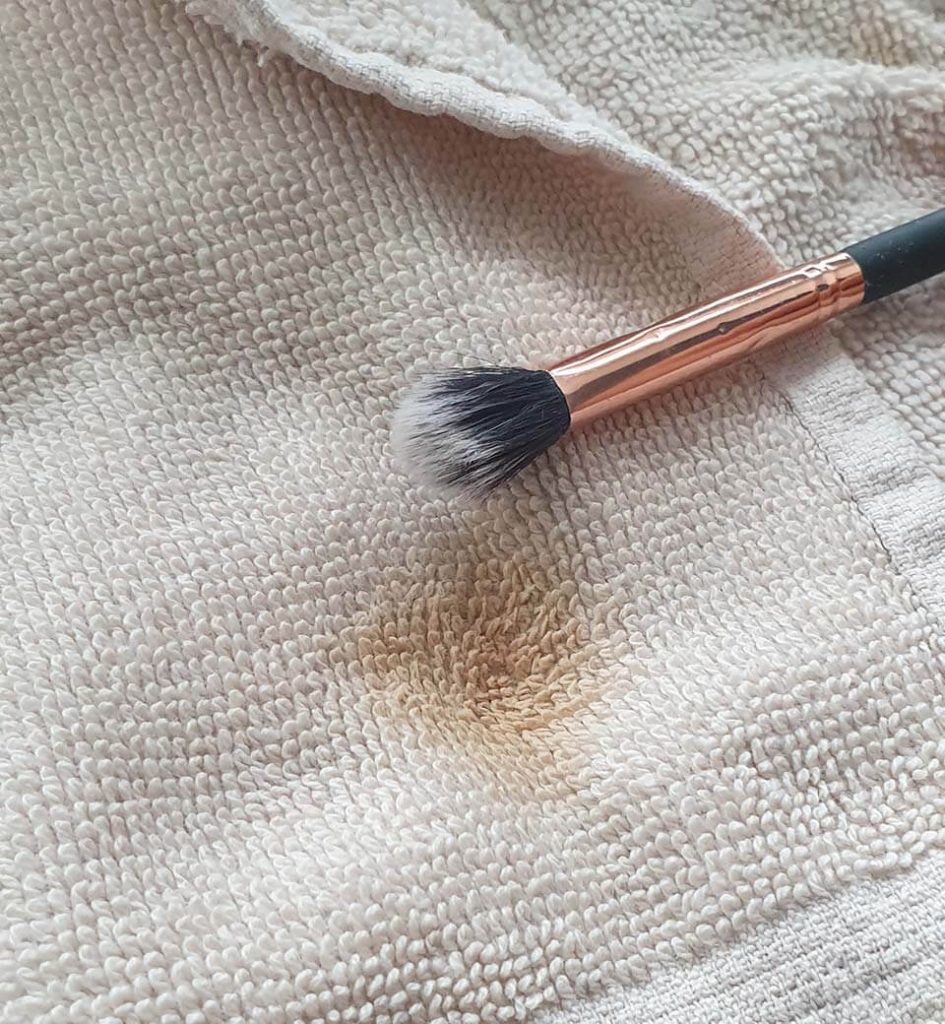
4. Reshape shape your brush
Gently rub and twist into the towel until all the makeup has come off. Don’t harshly rub your brushes straight into the towel. You want them to keep their shape.
To make sure you’ve cleaned it properly, keep moving to a different part on the towel & check for makeup. A lighter-coloured towel is best for this.
do the twist – clean by gently twisting
A nice and clean concealer brush, still in shape
5. Leave to dry
Don’t use your brushes within seconds of cleaning – they’ll probably still be wet. Leave for at least 3 minutes before using them.
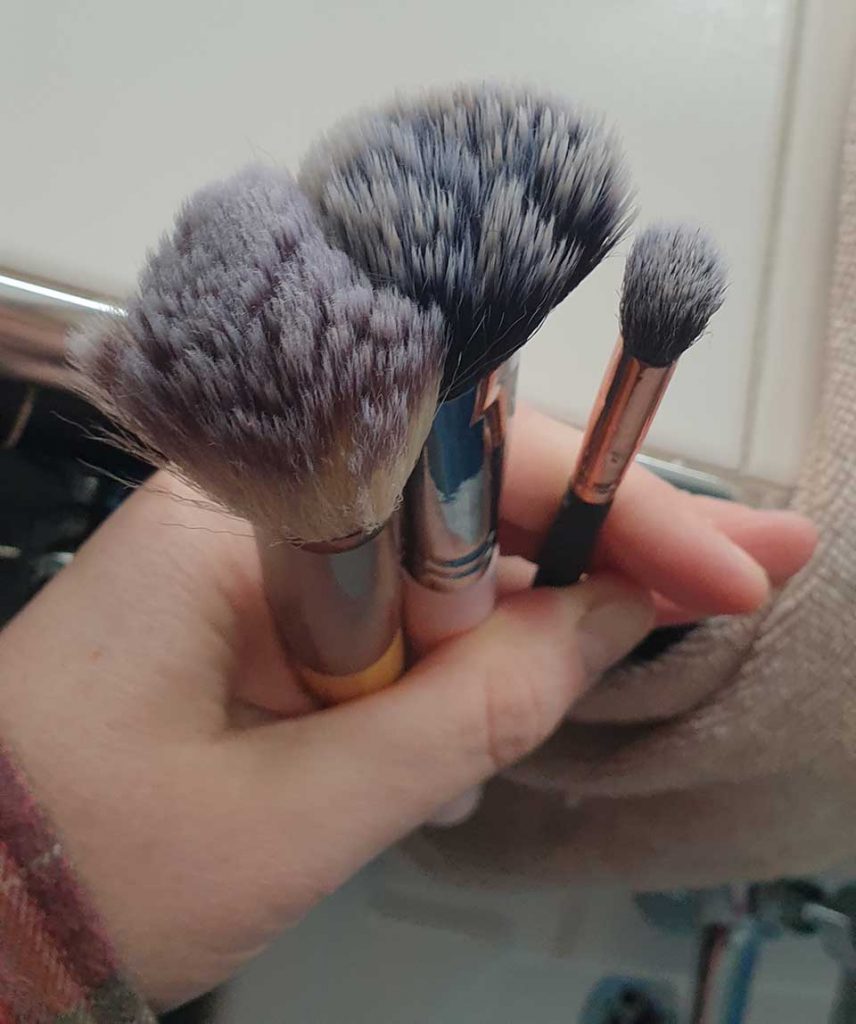
Lovely jubbly – nice clean brushes within minutes
How often should you clean your brushes?
I personally clean mine once they’ve been used 3 times. That’s 3 times within 3 days, or 3 times within 2 weeks. Dirty brushes will cause havoc to your skin. I have a few brushes so I can alternate between when one is dirty/being cleaned. You can buy ISOCLEAN for sponges too, but I tend to just throw them in the normal washing.
Where can I buy it?
I buy it from the ISOClean website, https://www.iso-clean.co.uk. It’s free delivery over £40, otherwise it’s £3.99. It’s worth signing up to the newsletter just incase they send you a code! You can buy smaller bottles first, to make sure you like it, then buy a bigger bottle & the infills.
• • •
Thanks for reading :) This article is tagged with:
I’ve made changes to my routine lately, due to previous lotions and potions running out. I like to try different things when I see lots of good reviews about them.
Here are my latest beauty favourites….
Sand and Sky Pink Clay
I got this last year as a pack which included the pink clay mask, exfoliating treatment and a free bag. It’s expensive in my opinion, but so worth it. I use both once a week. I use the mask on day 1, then the exfoliating treatment on day 2.
The mask comes with a little brush you use to apply all over your face. You leave on for 10 minutes, then remove. The mask changes from pink to white, and dries quite hard. It’s really easy to take off though. I use warm water and my Face Halo pad.
The mask: “… deeply cleanses the skin. It purifies and tightens pores right before your eyes.”
It leaves my skin feeling smooth and fresh. It makes my pores smaller and any spots are reduced in redness and size. I follow by moisturising.
The exfoliating treatment:
… is a powerful magnet, removing toxins, pollution and impurities from deep within the skin. The BFF of spot-prone complexions, it eliminates annoying shine and helps regulate oil production.*
It works by removing dead skin cells from your face, leaving a glow. It really does do this – after using my skin looks like I’ve got primer on. Really smooth and glowy.
You massage gently into your skin for 30 seconds, leave for 5 minutes (unless you have sensitive skin) then rinse off.
My advice if you are planning to buy this is go on their website, look around but leave without buying, then go to YouTube and look at anything. They will retarget you with advertisements, usually giving you money-off voucher codes. My husband did this and got 25% off from seeing an ad on Youtube.
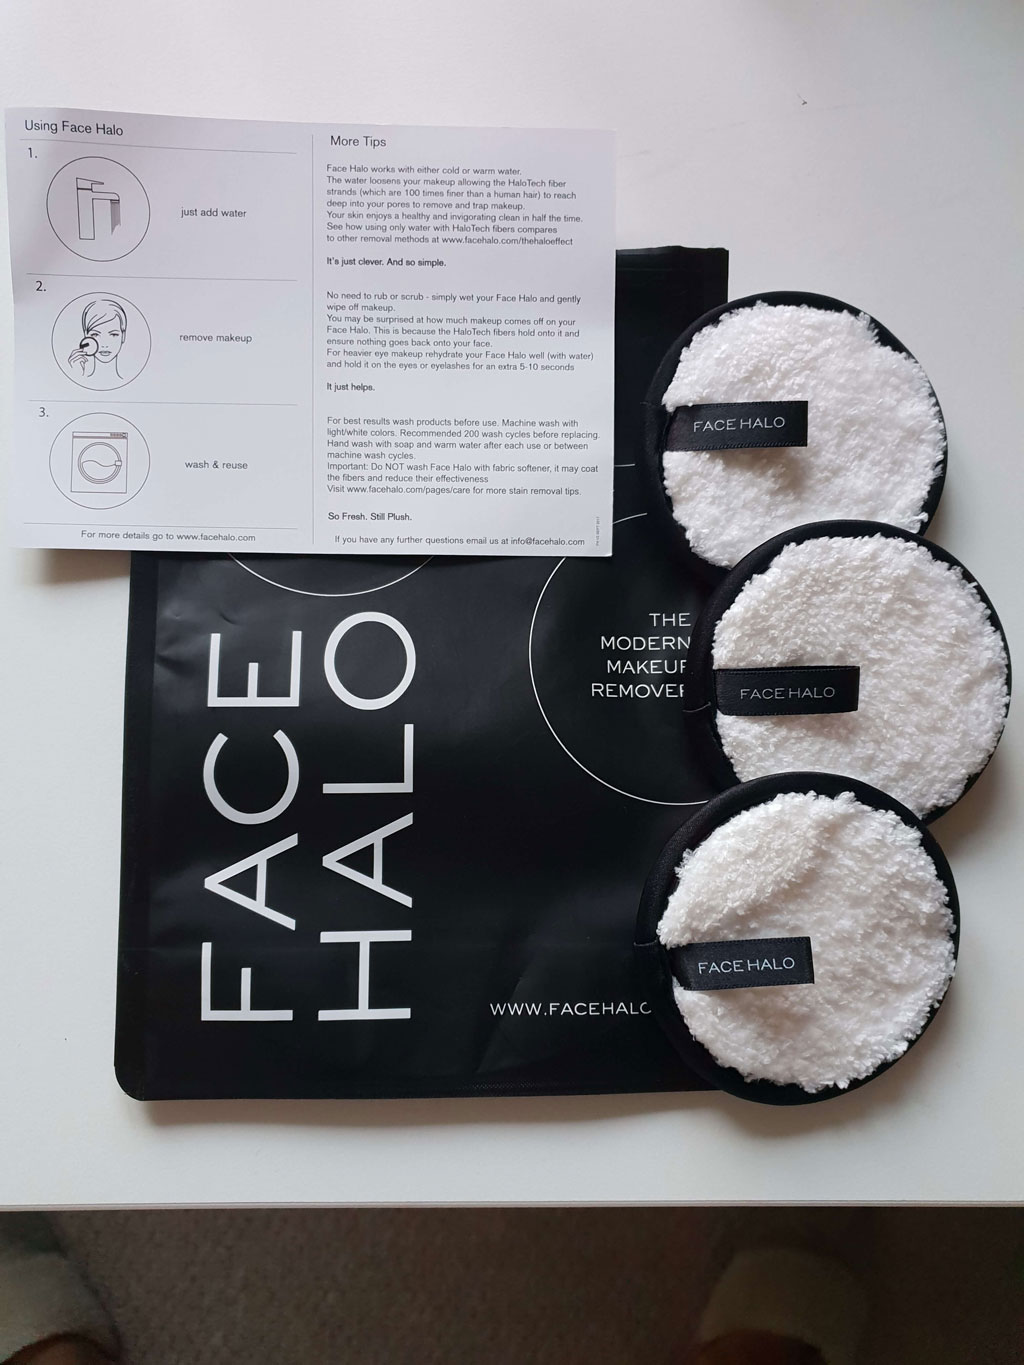
Face Halo face wipes
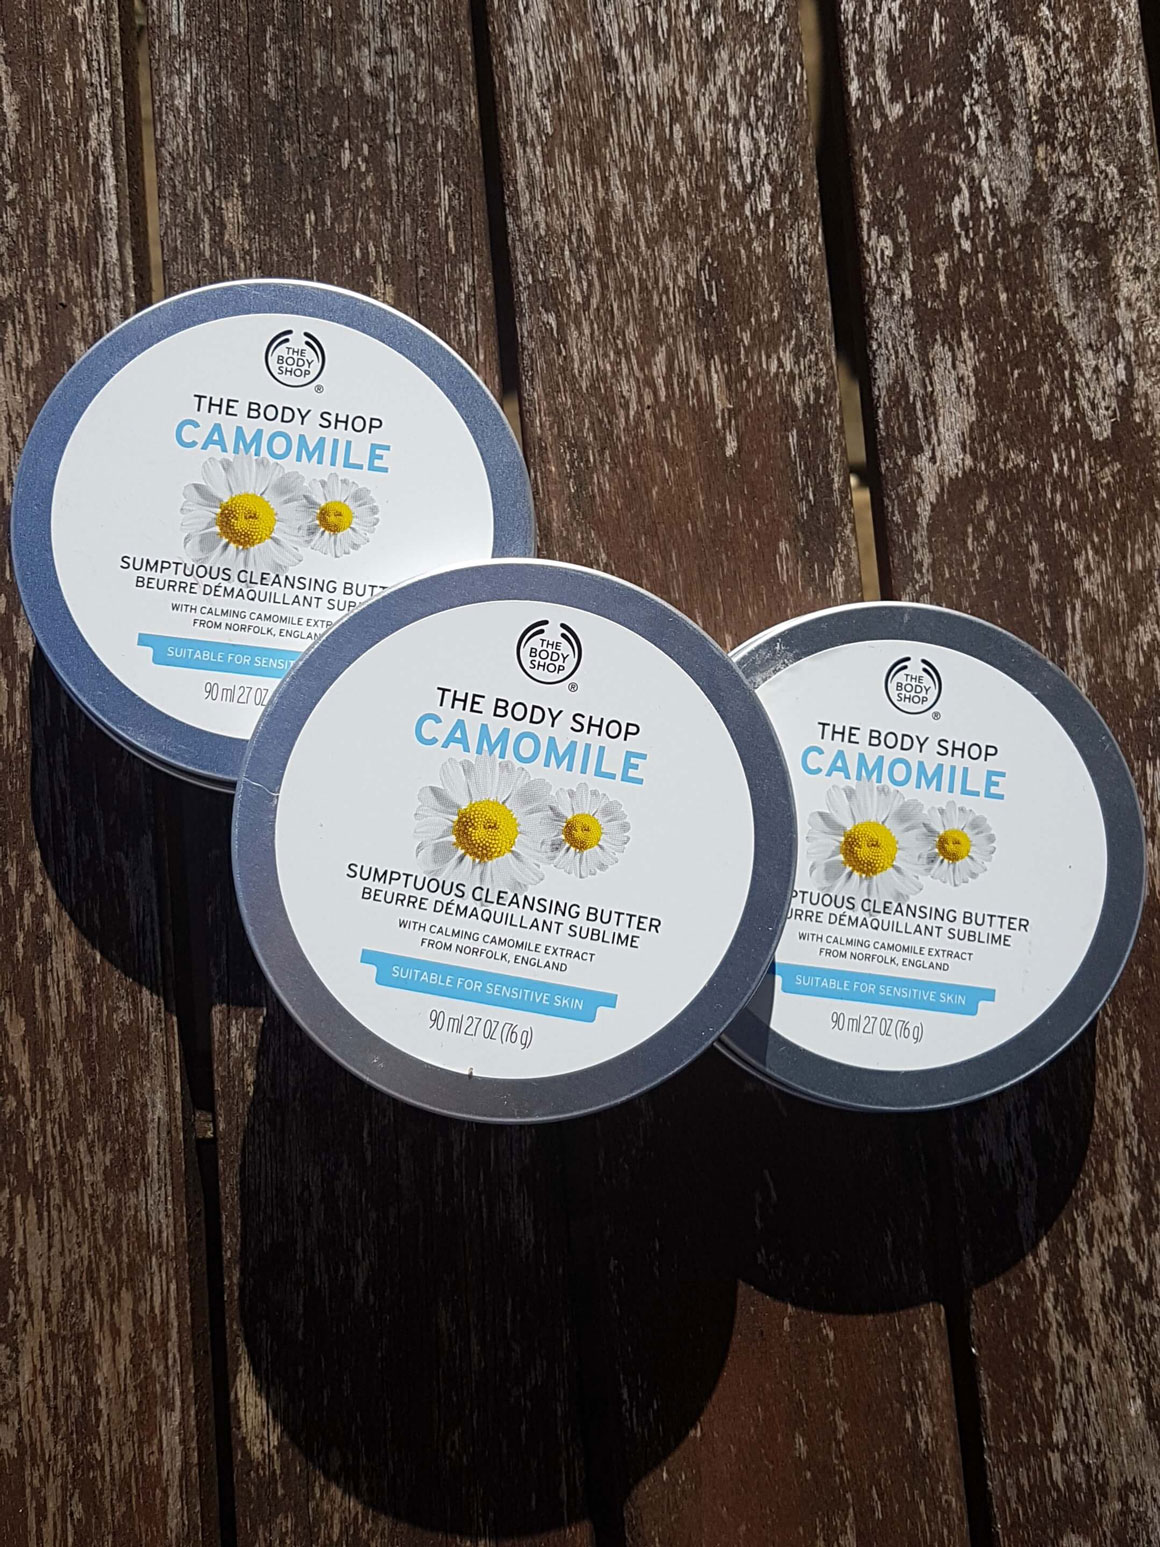
I wrote about these when I used The Body Shop’s Camomile cleansing butter which I’ve stopped using on my face and just use on my eyes (it’s an oily formula which does nothing for my oily skin).
I wear waterproof mascara and these wipes get rid of every last smudge of makeup.
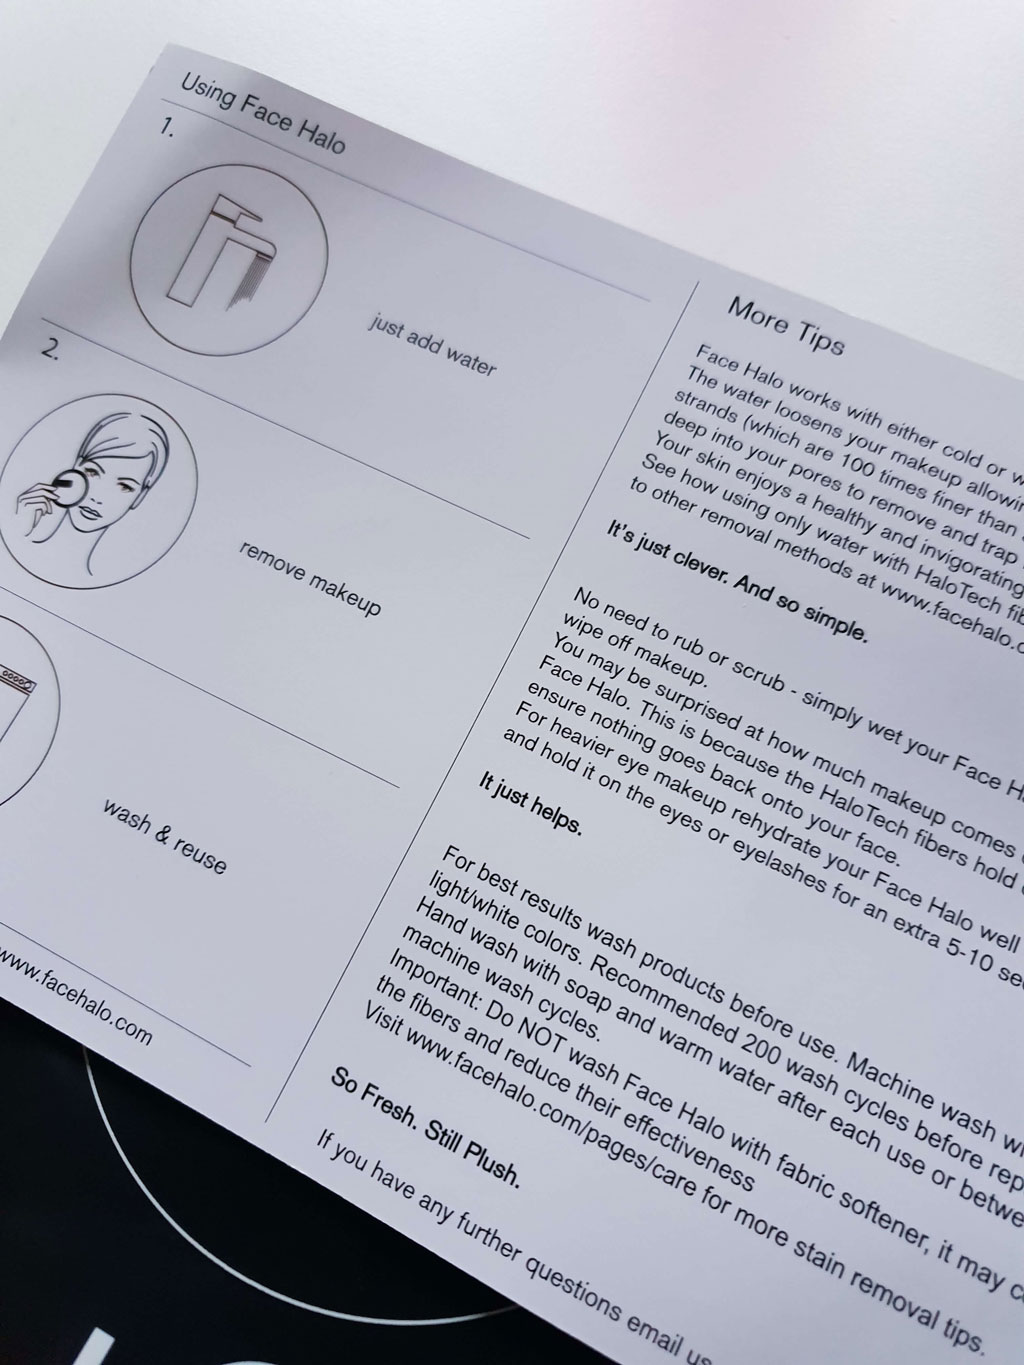
I’ve followed Chloe Morello for a while and noticed her promotions for Face Halo makeup remover that you can use only with water. They are kind on skin as they are made of white fibre strands,
“100 times finer than human hair to remove and trap makeup”.
Around the edge they have a black rim made of satin which is soft to touch.
Pricing
At $22 for a pack of 3, initially I thought they were expensive. But then I thought about it and considering makeup remover wipes are £2-3 for 20/30, is it really?
Considering you get “200 washes” out of each pad, not only is it better for the environment, it’s actually a cost-saving. It cost me £15.60 in total, so each one cost £5.20. You only need buy 3 packs of wipes and you’ve already gone over the price of 1 Face Halo. (That’s £0.26p per wash)
The Body Shop cleansing butter is £10. They nearly always have discounts on their website. I got my latest batch with 25% off + free delivery.
My skin has improved
When I use this on my face, it feels lavish and like I’m actually treating my face each time. It doesn’t feel like it’s pulling on my skin and I never get any redness afterwards, proving how soft it is on my skin. Considering the skin around the eye is so delicate, this was really important to me. Especially as I’m moving into my 30’s, I need to take even more care of those soon-to-be wrinkles.
My skin has genuinely improved since using Face Halo. It’s so much smoother and looks fresher.
After-care
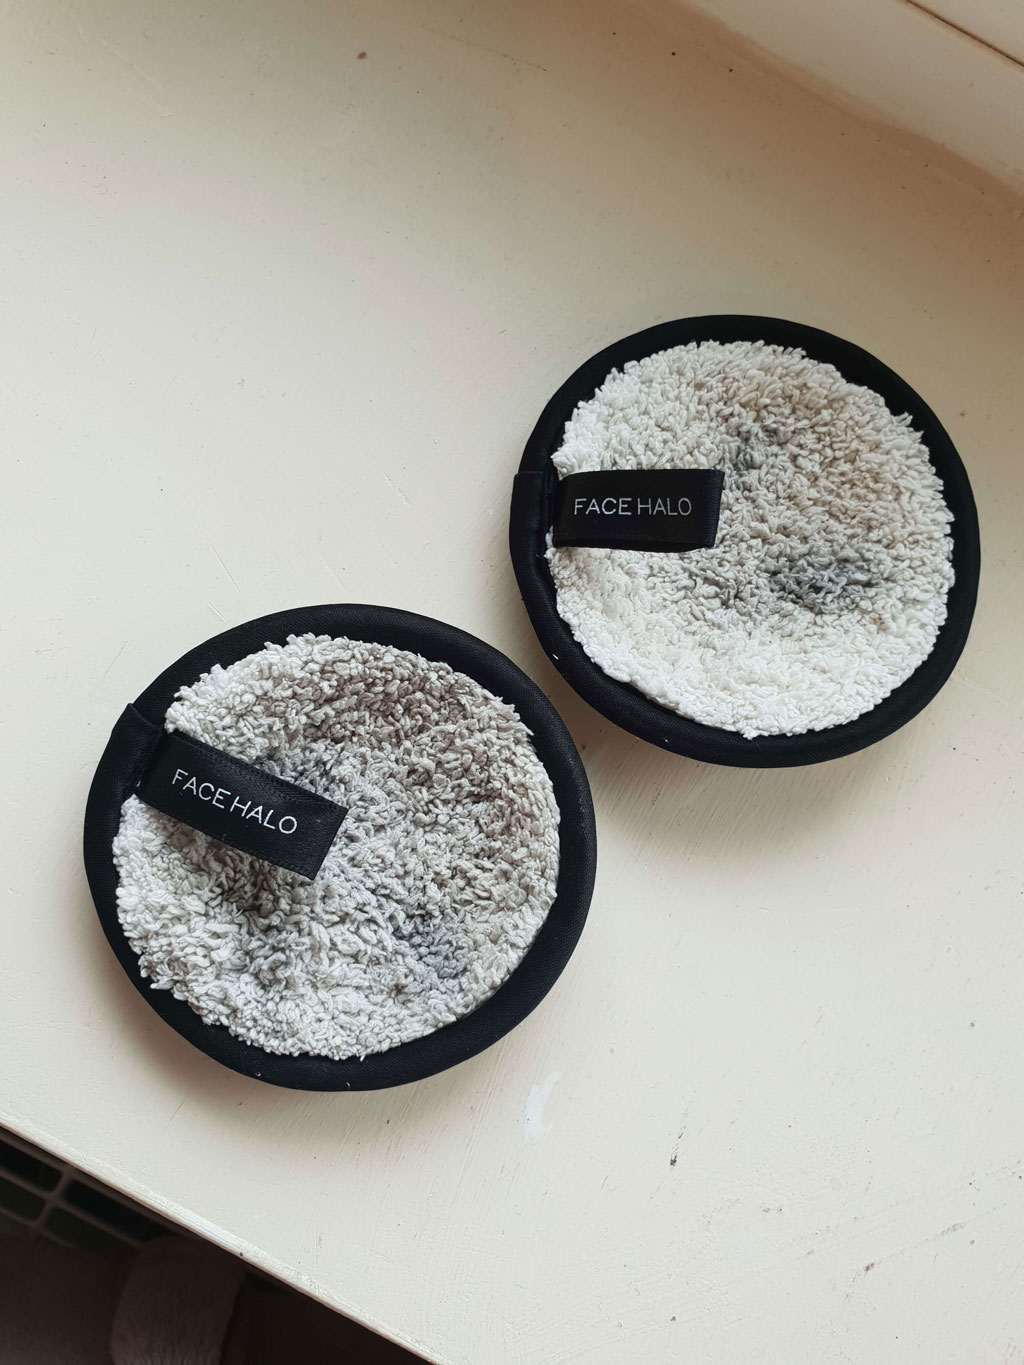
I don’t know what I expected, but considering I’ve been using them since the start of August, they are now looking – if being honest – quite gross. Every 2nd use I put them in the wash with my clothes then in the tumble dryer. I’ve never let the makeup sit on the Halo; I’ve always rinsed it after use. They are now stained which really puts me off using them. The Face Halo website says:
If you give it a very quick hand wash right after using with warm water and soap the makeup will release easily. If you leave it for a couple of days before washing it will take a little bit more time to release all the makeup. In this case we like to rub two Face Halo’s together under warm water with some good soap (even a natural dish soap for heavier makeup), then throw into the washing machine!
I have been doing this but they have still stained so I mustn’t have been doing it thoroughly enough. Maybe this is why they’ve bought out completely black Face Halos?
Overall
This will be my routine for a while. I absolutely love it. They go so well together. My face feels so clean I’ve actually stopped using moisturisers because my face doesn’t look like it needs it!
Update: 28 April 2019
I read up online how other fellow people are cleaning their Face Halos. From this advice I now:
clean after EVERY use – making sure it’s wet, I rub soap into the Face Halo. I rub the sides together to make a lather then after 30 seconds, I rinse. You’d be surprised at how much rubbish comes out.
I leave them on the radiator to dry in-between uses throughout the week
clean thoroughly in the main wash every week – I throw all 3 into my clothes wash each week.
I still use The Body Shop’s camomile on all my face but use a biodegradable wet wipe on my face and Face Halo on my eyes.
After a few months of getting a LOT of spots, I’ve stopped using Face Halo’s on my face. I just use them on my eyes, to remove mascara. After washing them with soap, I leave them on the radiator to dry. As it’s been warm, they haven’t been on, so they’ve been sitting there damp for a few days. This isn’t good, as bacteria loves damp conditions which could have been irritating my skin.
I’m not blaming these causing my spots, but since I’ve stopped using them on my face, I’ve noticed a small improvement. I still clean them as above, but I clean them much more thoroughly now.
I’m still using (and loving) Face Halo – I got new ones for Christmas as I stopped using my previous ones due to their state! I’m being more rigorous now with my cleaning, making sure after each daily use I’m getting as much mascara out with soap as possible.
I was using The Body Shop’s Camomile cleansing butter with my Face Halo, due to reducing down the number of products I’m currently using on my skin, in an attempt to calm down my spots/acne. If you’d like to read more about other tips I’m doing to calm my skin, I’ve made a blog about it here. Face Halo gets rid of all my makeup without the need for the Camomile so it was an easy decision. I don’t have anything against the Camomile; it’s a great product, just not needed.
Update: 12 March 2021
Still using the same as above – using the pad on my whole face and the Body Shop camomile on my eyes only. I wash & re-use each pad once with soap (leaving on a radiator to dry in-between), then throw in the washing machine along with clothes. I clean my face with the pad first, then use it to get off mascara. I don’t use it on my eyes first as I don’t want to rub mascara all over my face!
• • •
Thanks for reading :) This article is tagged with:
I’ve always been obsessed with make-up. Not so much with wearing it; just how much it can change how someone looks, and how it can make you feel.
I got married in 2014 and did my own make-up, even after having a wedding trial. I don’t wear a lot of make-up, so when the trial lady (who didn’t have much make-up on herself) seemed to absolutely lash the foundation on, she answered my hmmm with… “It’s quite heavy yes, but you will look amazing on the photos”. This didn’t fill me with comfort, as I’d rather not be uncomfortable all day thinking about how much make-up I’m wearing. Plus I wanted my Husband to actually recognise me when I got to him in church!
I put into action a challenge to find my ultimate go-to make-up routine, that I’d feel comfortable with on my wedding day; that would stay on all day; and would be relatively quick to put on.
I’ve always had under eye bags and puffiness, for as long as I can remember. The last few years I’ve attempted numerous serums, patches, creams, even cold tea bags / cucumber / tea spoons, but nothing has made me think “WOW – this works”. I have a healthy diet, and sleep well – even my folks don’t have them, so I had to come up with something that’d make me feel OK again.
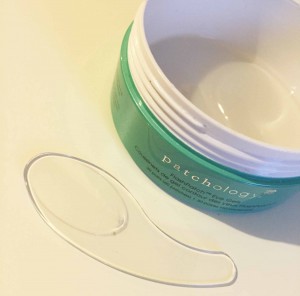
Patchology comes with 30 pairs of eye patches and a little spoon to help separate them
I’m always on Instagram checking things out, when I stumbled across a photo of Olly Murs with some under eye patches on. I did a search and found ‘Patchology’ – I’m not sure if he was wearing these, but I decided to investigate. A search on Amazon.com and I discovered 13 reviews (at the time of writing) and 5/5 stars for Patchology Flashpatch Eye Gels. At $50 + delivery, yes; it’s a pretty expensive beauty item, but this didn’t put me off! So off and I went and purchased a month’s worth.
When they came, I instantly popped them in the fridge. It doesn’t say to do this, but I still use the cold tea spoon idea because it feels so good, and wakes my eyes/face up no end. Putting them in the fridge definitely helps the patches wake my eyes up. The instructions say to leave them on for 5 minutes. I leave them on for about 30 minutes whilst I’m doing other things.
Seeing as though it took me a while to figure out my own make-up routine, I thought I should write about it, as someone somewhere might benefit from even a small part of what I do, and how I do it – in particular covering dark circles and puffy bags. The make-up used throughout is animal cruelty-free 🙂 Some of the items are expensive, however, as they last so long, to me it’s worth it. The Laura Mercier concealer I’ve got was expensive to purchase, but I bought it in January 2015 and still have over 1/4 left – and I use it every day.
Even though I don’t use contouring, I’m forever watching videos on it – it’s incredible what can be done nowadays. I wouldn’t like to use contouring on myself, because it looks quite heavy. Great on film, photos – but in real life, it’s not for me. I prefer a light make-up routine, that I’ll go through step-by-step now.
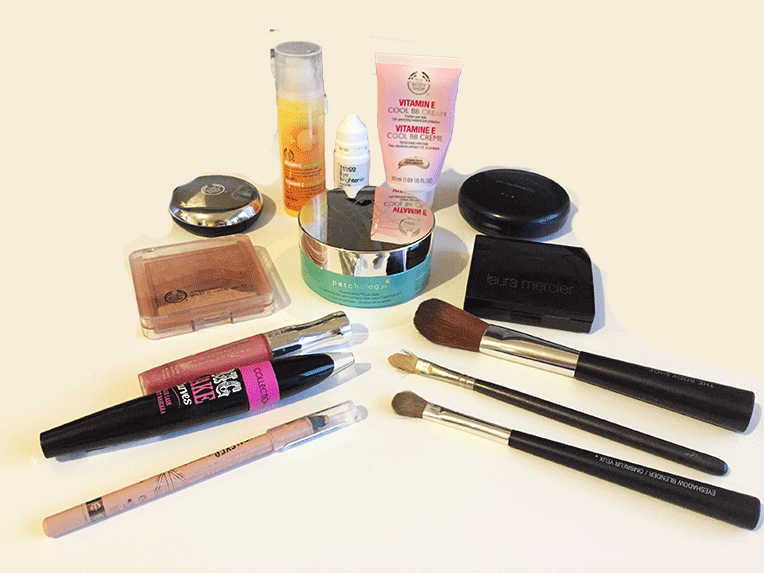
You’ll find the materials I’ve used at the bottom of this tutorial.
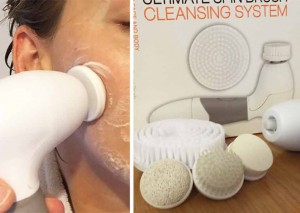
Step 1 – prep
Before I do anything, I wash my face. I do this with a facial brush I found on eBay for £8. It spins round, which makes sure every last bit of dirt comes off my face. I use the small brush (middle) with soap. It leaves my face feeling amazingly clean and ready for the day.
I also pop eye drops into my eyes at this point to get rid of any redness. It also helps to wake them up.
Step 2 – Patches
I leave these on for 30 minutes, whilst I’m doing other things. Although you can just leave them on for 5 minutes to get amazing results.
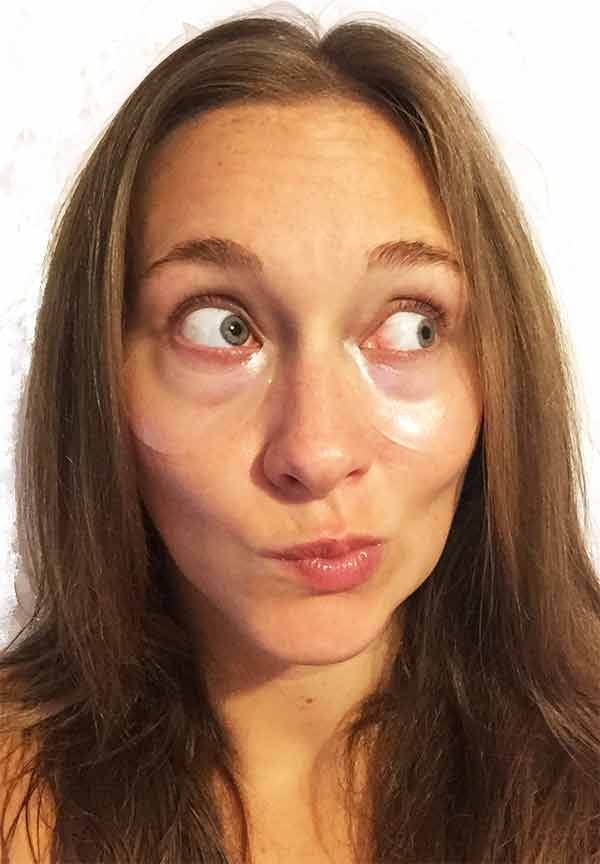
Afterwards remove any excess serum with a wipe.
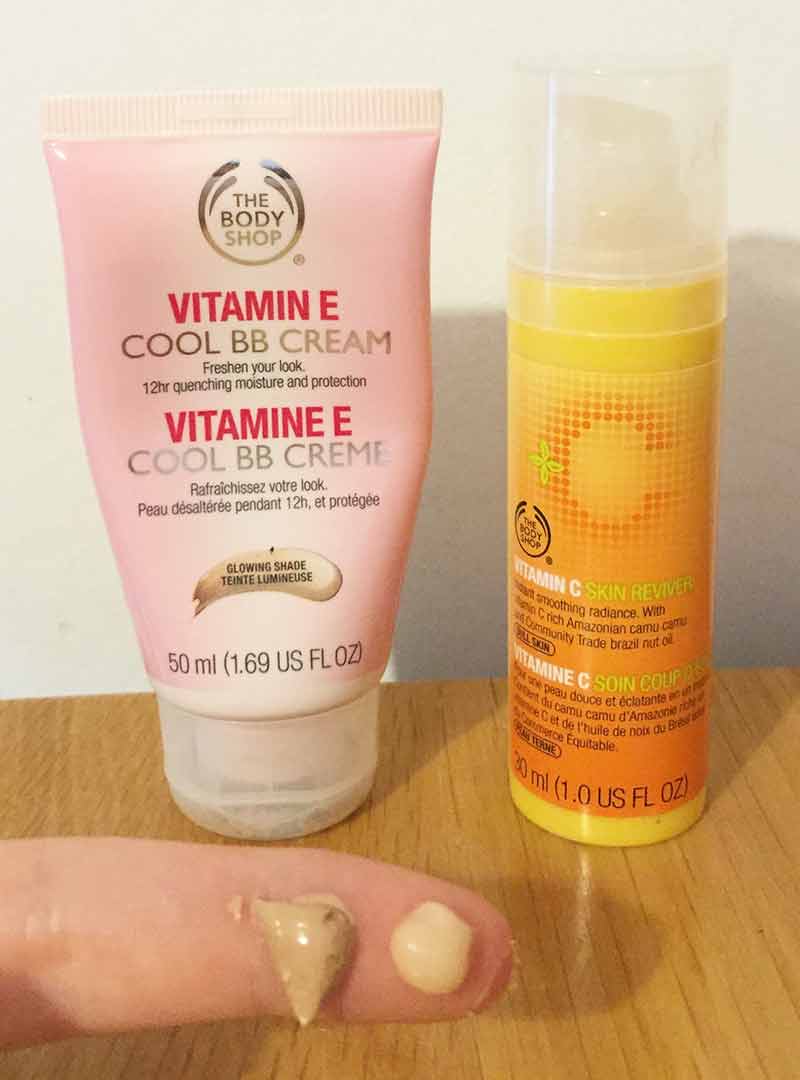
Step 3 – Moisturise
I use 2 moisturisers before I apply my make-up. I use a small blob of each & apply to my face in circular upwards motions. The Body Shop Vitamin C skin reviver makes me look refreshed and awake; Vitamin C is great for skin. The Body Shop Vitamin E BB Cream gives my skin a gorgeous glow (but not too dewey) and gives a slight coverage. Once these have settled in your skin, then it’s time for make-up!
Step 4 – Top lashes mascara
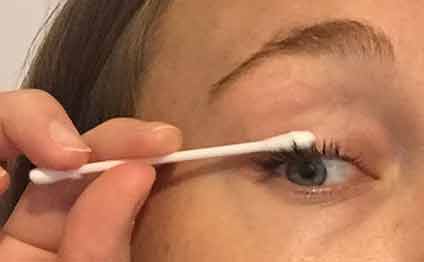
At this point I put on mascara but only on the top lashes. The bottom ones come later. I do it this way so I don’t have to wait for the bottom lashes to dry before I start on my foundation/concealer, and also as I’m not very neat, it’s quick and easy to remove any mistakes with a cotton bud!
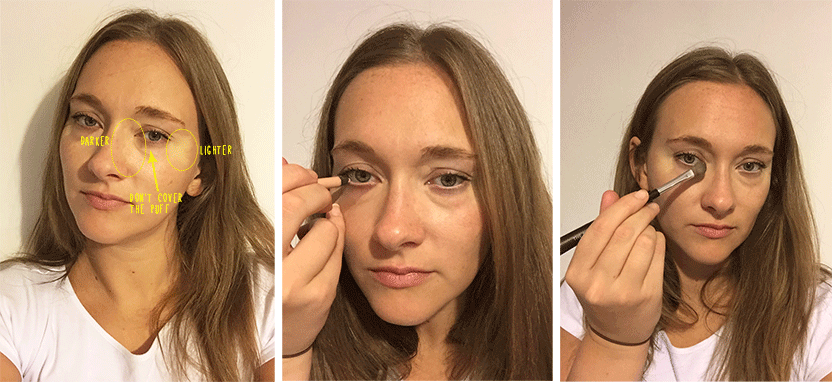
Step 5 – concealer
I use Laura Mercier Secret Camouflage because it includes 2 colours; a light and dark. Use the darker (it isn’t actually a dark colour, it’s just slightly darker than the light!) underneath the eye but DO NOT touch or put ANY concealer on the actual puffiness of the eye. Only apply it to the dark bags, and next to the nose.
Add cream eyeliner to give a light effect to your eye area. White is also a popular colour, but I feel for me, cream is more of a natural skin colour. Steer clear of black as this will emphasis the darkness of your bags.
Blend in the concealer using a blender brush. Be very gentle, and don’t rush. I start with the darker colour and blend my nose first, then I work outwards. The lighter colour at the edges will help to highlight your face and take the attention away from your bags.
I then pat very lightly & gently foundation over the top of the black under eye bags, not the puffiness. This helps to settle the concealer. Use the same blender brush and lightly sweep from your nose outwards. I use Mac Studio Fix in NC25 for this.
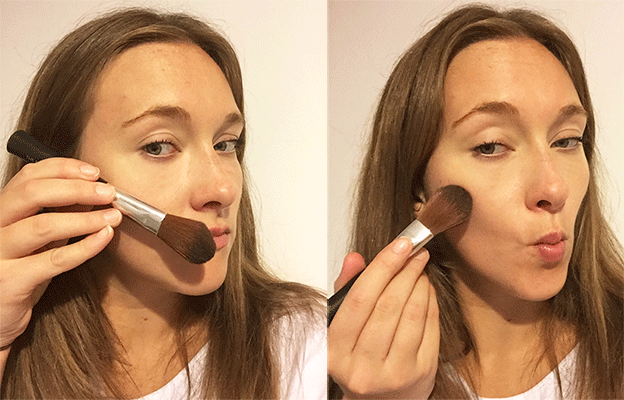
Step 6 – Blush
Get your pout on! Put the blush brush up against your face to help visualise where you’ll be adding it. Then sweep using an outwards motion gently, not adding too much blush with each sweep. It should slowly become more noticeable as you keep applying.
Don’t just add blush to your cheeks – use what’s left on your brush to lightly brush your forehead, nose and chin. This will give the illusion of a tan – winner!
Finish up by adding mascara to your bottom lashes, and I personally use a peach shimmer eyeshadow to give my eyes yet another highlight.
Step 7 – finished result
Unfortunately miracles don’t happen and I can’t hide ALL of my black under eyes / puffiness. However, I find using the steps above helps me feel so much better about myself, and not care as much. If you take the attention away from your bags by having your other features look nice, it will help your confidence no end. I use these steps on a daily basis, for work, lunch, meet-ups with friends. If I’m going out, I’ll add more blush, eyeliner and darker eyeshadow.
I find the blush really helps to make you look healthier and really finishes off your make-up.
Materials
Okay so here’s a list, in order, of everything I’ve used in the above make up tutorial.
Ultimate Spin Brush Cleansing System (eBay £8!)
Patchology Flash Patch eye patches (Amazon.com)
Tesco Eye Brightener drops
Body Shop Vitamin E Cool BB Cream
Body Shop Vitamin C Skin Reviver
Collection Big Fake Curves mascara
Body Shop brow & liner kit 02
Laura Mercier Secret Camouflage SC2
Rimmel Scandal Eyes eyeliner, 005 Nude
MAC Brush 194
Body Shop eyeshadow blender brush
MAC Studio Fix NC25
Body Shop Shimmer waves blush 01
Body Shop Blusher brush
Rimmel Stay and Glossy lipgloss 160 “Stay My Rose”
And that’s it folks… Thanks for reading and I hope you’ve been able to take away something from this tutorial!
• • •
Thanks for reading :) This article is tagged with:


 Insta
Insta
 Tik Tok
